In today’s digital world, our inboxes overflow with emails – some urgent, others less so. We’ve all been there: wading through a sea of unread messages, worried we might have missed something important.
| Email Platform | Steps |
|---|---|
| Apple Mail (iPhone, iPad, Mac) | 1. Open an email from your desired VIP. 2. Click or tap their name in the header. 3. Select “Add to VIPs”. |
| Gmail (Web, Android, iOS) | 1. Open an email from your desired VIP. 2. Click the “Star” icon next to their name. 3. (Optional) Create a filter to automatically star future emails from this contact. |
| Outlook (Web, Windows, Mac) | 1. Open Outlook. 2. Go to “People” and choose your desired VIP. 3. Click “Categorize” in the toolbar. 4. Select “VIP.” |
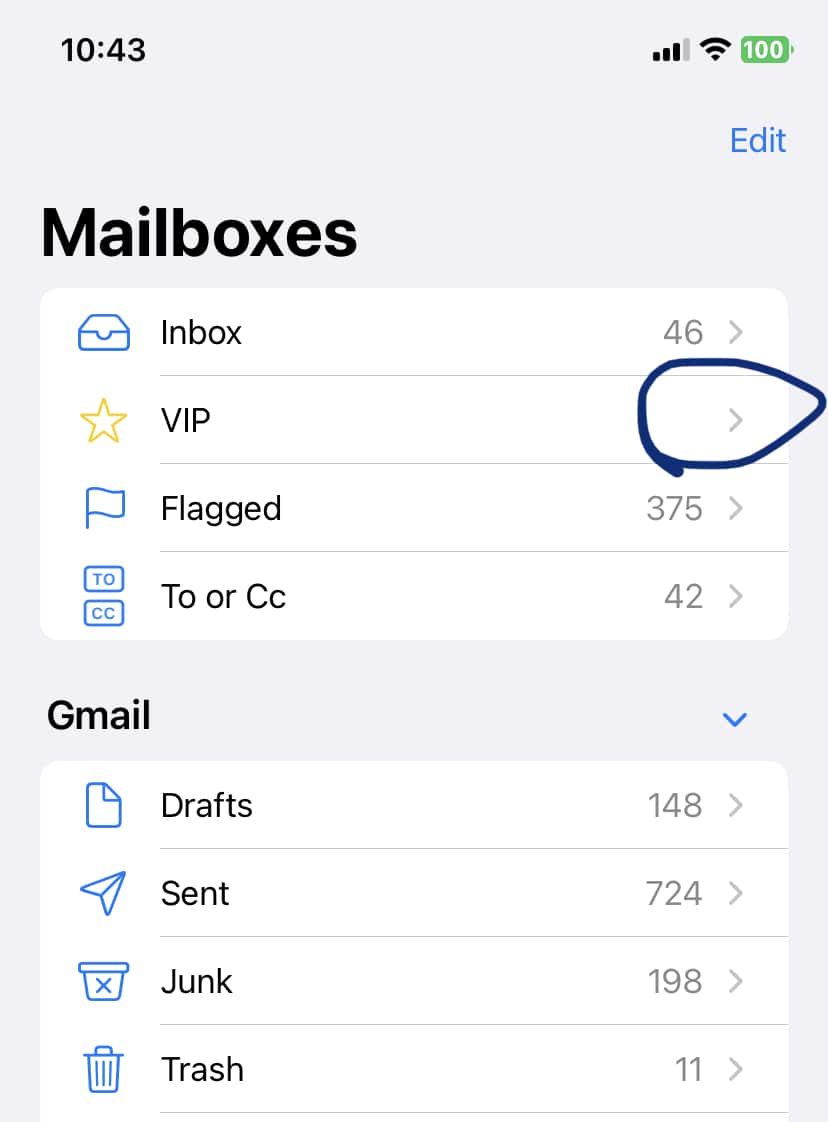
But fear not! There’s a handy solution: enabling VIPs in your email. This clever feature lets you designate key contacts as “Very Important People” (VIPs). Once activated, their emails will be prioritized, ensuring they never get lost in the shuffle.
Here’s what you gain by using VIPs:
- Peace of Mind: No more inbox anxiety – you’ll know at a glance if there’s a crucial message waiting from a VIP.
- Streamlined Communication: Focus on what matters most by prioritizing emails from the senders who truly deserve your immediate attention.
- Increased Productivity: Spend less time sifting through emails and more time tackling what truly matters.
What is VIP in Mail?
The VIP feature in your email app is your secret weapon for conquering inbox chaos. By designating your most valuable contacts as ‘Very Important Persons’, you create a dedicated space for their emails. This ensures critical messages are readily visible, letting you respond with the speed and attention they deserve.
The Importance of VIPs in Mail
Ready to master VIPs in Apple Mail? Here’s how:
- Open your Mail app.
- Locate an email from your important contact.
- Hover over their name (it’ll highlight in blue).
- Click their name – a menu will appear.
- Choose ‘Add to VIP’ and you’re all set!
How to Turn On VIPs in Mail
Ready to unlock the power of VIPs in your inbox? The setup process is simple! While the exact steps might change slightly based on your email app, the basic idea is always the same.
Setting Up VIPs in Apple Mail
Ready to master VIPs in Apple Mail? Here’s how:
- Open your Mail app.
- Locate an email from your important contact.
- Hover over their name (it’ll highlight in blue).
- Click their name – a menu will appear.
- Choose ‘Add to VIP’ and you’re all set!
Enabling VIPs in Outlook
Ready to prioritize those key contacts in Outlook? Here’s how to activate their VIP status:
- Open Outlook.
- Head to the ‘People’ section.
- Choose your important contact.
- In the toolbar, click ‘Categorize’.
- Select ‘VIP’ – and that’s it!
Configuring VIPs in Gmail
Gmail may not have a ‘VIP’ button, but don’t worry! Here’s how to create your own VIP system with the ‘Star’ feature:
- Open Gmail.
- Find an email from your important contact.
- Click the ‘Star’ icon next to their name (it’ll turn yellow).
Now, their emails will stand out for easy identification! You can even create a filter to automatically star future emails from these special contacts.
More Tips for Effectively Using the VIP Feature
You’ve activated VIPs – now what? Let’s level up your inbox organization with these handy tips:
- Be selective: Reserve VIP status for only your most critical contacts to keep that inbox streamlined.
- Customize notifications: Set unique alert sounds for VIP emails, so you instantly know when something important has arrived.
- Review regularly: As your relationships and priorities change, don’t be afraid to update your VIP list.
Keep Your VIP List Exclusive
Keep your VIP list exclusive! It’s meant to spotlight your most critical communications. Adding too many contacts defeats the purpose and can lead to a cluttered VIP inbox. Choose wisely to maximize the feature’s impact.
Combine VIPs with Other Email Management Strategies
Supercharge your inbox control by combining VIPs with ‘Do Not Disturb’ hours. This powerful duo lets you focus on important messages when it matters, and enjoy distraction-free time when you need it.
Review Your VIP List Periodically
Don’t let your VIP list get stale! As your priorities shift, make sure to update who’s included. Regular reviews keep this feature working effectively for you.
Benefits of Turning On VIPs in Mail
Why bother with VIPs? This simple feature packs a surprising punch! Get ready to experience:
- Effortless organization: Instantly spot the messages that matter most.
- Increased productivity: Spend less time sorting and more time doing.
- Reduced stress: No more worrying about missing something crucial.
Improved Email Organization
VIPs create a clear divide in your inbox, instantly separating the urgent from the everyday. This saves you precious time and makes managing your emails a whole lot smoother.
Enhanced Productivity
Ditch the email distractions! By prioritizing your VIPs, you create a calmer inbox. This newfound focus lets you tackle those truly important tasks with greater clarity.
Lowered Stress Levels
Tame your inbox, tame your stress. Activating VIPs brings order to the chaos, giving you a much-needed sense of control over your email.
FAQs
What does turning on VIPs in mail do?
It designates specific contacts as “Very Important Persons.” Their emails then get their own dedicated space, so you’ll never miss a crucial message.
Can I turn on VIPs in any mail app?
Most popular email apps like Apple Mail and Outlook have built-in VIP features. Gmail doesn’t have an exact “VIP” function, but you can achieve a similar effect by starring important emails and using filters.
How many contacts can I add to my VIP list?
The limit varies between email providers. But remember, the real power of VIPs comes from keeping the list exclusive – only include your most critical contacts.
Can I remove contacts from my VIP list?
Absolutely! Your VIP list is flexible. As your connections and priorities change, you can add or remove contacts.
Will turning on VIPs stop other emails from coming in?
No, you’ll still receive all your emails. VIPs simply create a separate space for messages from your most important contacts.
Is the VIP feature the only way to manage emails effectively?
No! It’s a powerful tool, but only one part of a complete email management strategy. Consider combining it with features like “Do Not Disturb” hours or automated responses for even better control.
Conclusion
Is your inbox a chaotic mess? Turning on VIPs in mail is your solution! This simple feature prioritizes emails from your most important contacts, so you never miss a critical message. Experience the benefits:
- Skyrocket Productivity: Spend less time digging, more time doing.
- Masterful Organization: Effortlessly separate the urgent from the everyday.
- Stress-Free Inbox: Take a deep breath – you’re in control.
Ready to transform your inbox? Activate VIPs today and start streamlining your communications!

