Replacing the battery in an iPad Air 2 is a practical solution for users experiencing diminished battery life or other power-related issues. Over time, the battery in these devices can degrade, leading to a need for more frequent charging or, in some cases, a complete failure to hold a charge. For those with an iPad Air 2 that’s out of warranty, or for users who prefer a hands-on approach, battery replacement is a cost-effective alternative to purchasing a new device.
Before attempting to replace the battery, it’s important to determine whether the iPad is still under Apple’s warranty, or if it’s covered by AppleCare+. If the device is still covered, seeking service from Apple or an authorized provider is advisable to maintain the warranty’s validity. If proceeding with a replacement is the chosen route, gathering the right tools and replacement parts is essential. High-quality components and specialized tools are required to open the device without damaging it, as the iPad Air 2 is constructed with adhesive bonds that require careful handling.
iPad Air 2 Battery Replacement Guide
⚠️ Difficulty: High
⏱️ Time Required: 1–2 hours
🛠️ Skill Level: Intermediate to Advanced
The iPad Air 2 is thin and glued together with strong adhesive, so patience and care are essential. If you’re not comfortable with delicate electronics, consider professional repair.
🔧 Tools & Parts You’ll Need
- Replacement battery (for iPad Air 2, model A1566/A1567)
- iOpener, heat pad, or hair dryer (for softening adhesive)
- Suction cup
- Plastic opening picks / guitar picks
- Plastic cards or spudger
- Phillips #00 screwdriver
- Tweezers
- Isopropyl alcohol (≥90%) & cotton swabs (optional, for loosening adhesive)
- Adhesive strips (if re‑sealing the screen)

🪛 Step 1: Power Down
- Turn off your iPad completely.
- If possible, discharge the battery below 25% (reduces fire risk).
🔥 Step 2: Heat the Edges
- Warm the edges of the iPad with an iOpener or hair dryer on low.
- This softens the adhesive holding the screen.
📱 Step 3: Open the Display
- Place a suction cup near the bottom edge of the screen.
- Gently pull up to create a small gap.
- Insert a plastic pick and carefully slide it around the edges.
- Reheat as needed.
- ⚠️ Be careful near the right edge — display cables are located there.
🔌 Step 4: Disconnect the Display
- Lift the screen slightly (like opening a book).
- Remove screws securing the display shield bracket.
- Disconnect the battery connector first, then the display connectors.
🔋 Step 5: Remove the Old Battery
- The battery is glued firmly to the chassis.
- Apply gentle heat to the back of the iPad.
- Insert plastic cards under the battery and work slowly.
- If needed, apply small amounts of isopropyl alcohol to weaken adhesive.
- ⚠️ Do not puncture or bend the battery — it can catch fire.
🆕 Step 6: Install the New Battery
- Place the new battery in the same position.
- Connect it temporarily to check alignment.
🔗 Step 7: Reconnect the Display
- Reconnect the display cables.
- Re‑attach the shield bracket.
- Connect the battery last.
📑 Step 8: Seal the iPad
- Test the iPad before sealing — check charging, touchscreen, and display.
- If all works, press the display back down.
- Use new adhesive strips if the old ones are weak.
✅ Step 9: Power On & Test
- Turn on the iPad.
- Test charging, Wi‑Fi, sound, and touch responsiveness.
Congratulations — your iPad Air 2 has a new battery! 🎉
For step‑by‑step pictures, you can follow iFixit’s illustrated guide (source: iFixit).
Key Takeaways
- Battery issues in an iPad Air 2 can be resolved through replacement, extending the device’s usability.
- A valid warranty or AppleCare+ coverage is ideal for professional battery servicing through Apple.
- Proper preparation and the use of correct tools are critical for a successful battery replacement.
Preparing for Battery Replacement
When your iPad Air 2 is no longer holding a charge the way it used to, it may be time to consider a battery replacement.
Evaluating the Need for a New Battery
iPad Air 2 users might notice battery degradation over years of use. This can be evident when the device runs out of power faster than it did when new or if it shuts down unexpectedly. Battery capacity diminishes with time; a battery replacement can restore the iPad’s lifespan and performance. If these symptoms match your experience, the battery likely needs replacing.
Understanding Warranty and AppleCare+
Check your device’s warranty status and AppleCare+ coverage before attempting a repair. AppleCare+ may cover battery replacement if it retains less than 80% of its original capacity. However, opening the iPad Air 2 yourself could void the warranty. If covered, it’s best to have the battery replaced by Apple or an authorized service provider.
Gathering the Required Tools
To replace the battery, you’ll need specific tools:
- iOpener or heat gun: for softening the adhesive.
- Suction cup: to lift the screen.
- Opening picks: for slicing through the adhesive.
- Anti-static clamp: to keep your device grounded.
- New battery: ensure it’s compatible with the iPad Air 2, models A1566 or A1567.
- Adhesive strips: to fix the new battery in place.
Before starting, it is crucial to have all the necessary tools at hand to avoid mid-repair disruptions.
Executing the Battery Replacement
Replacing the battery in an iPad Air 2 is a delicate process that requires attention to detail and the right tools. This guide will take you through the steps needed to safely open your iPad, disconnect and remove the old battery, install a new one, and put your device back together.
Safe Opening Procedures
It’s crucial to protect the iPad Air 2’s LCD screen when opening the device. Begin by heating an iOpener in boiling water for about 2 to 3 minutes. With care, lay the iOpener over the edge of the iPad to loosen the adhesive. Then, use a suction cup and an opening pick to gently separate the front panel from the body without disturbing the front-facing camera or display cables.
Disconnecting the Battery Connector
Once the front panel is open, locate the battery connector and disconnect it to prevent any power from reaching the device during the repair. This can help avoid short circuits or damage. Tools like a plastic spudger are ideal for this, as they allow you to pry up connectors without causing damage.
Removing the Old Battery
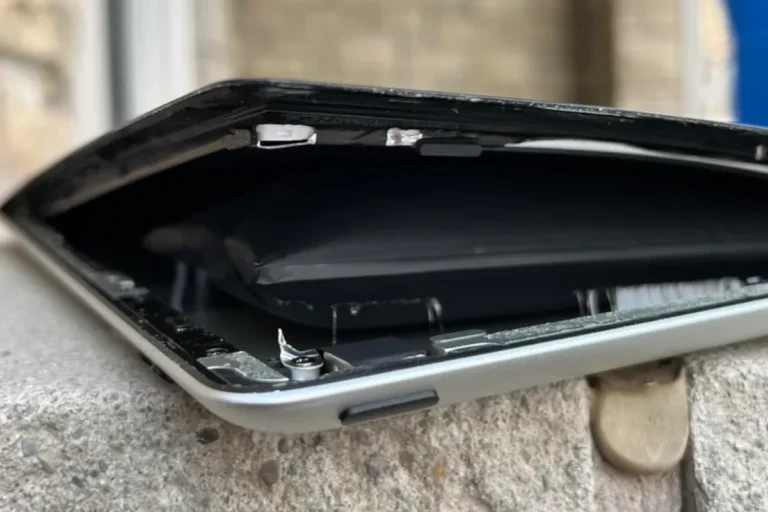
The iPad Air 2’s battery is held in place by strong adhesive. To deal with a swollen or overheating battery, you might apply clear packing tape over it to prevent any glass shards from causing injury. Then, gently apply constant pressure to lift the old battery out. If the battery doesn’t budge, reheat the iOpener and apply it to the back of the device to soften the adhesive, making the removal easier.
Installing the New Battery
Once the old battery is out, prepare the new battery by ensuring it’s the correct model for either the A1566 or A1567 iPad Air 2. Place the new battery in the open slot and press it firmly into place so that the new adhesive can bond properly. Make sure the battery is aligned correctly, and do not twist or bend the battery during installation.
Reassembling the iPad Air 2
To reassemble your iPad, reconnect the battery connector with care. Align the display cables and gently press around the edges of the screen to re-adhere it to the frame. Avoid pressing too hard on the center of the LCD screen. Test the iPad to confirm the new battery is functioning correctly before sealing the device up.
Frequently Asked Questions
When it comes time to replace your iPad Air 2 battery, you might have some questions. This section aims to address the most common concerns and provide you with accurate, up-to-date information.
How much does it cost to replace an iPad Air 2 battery?
The cost of replacing an iPad Air 2 battery can range from $99 to $179 if you opt for service through Apple. Prices may vary if you choose another repair service or if you have coverage under AppleCare+.
Can I replace the battery in an iPad Air 2 myself, and what are the risks?
Yes, it’s possible to replace the battery yourself using a kit; however, there are risks like damaging your iPad if not done correctly. It requires specific tools and a step-by-step guide to avoid any harm to the device or yourself.
Where can I find a service to replace my iPad Air 2 battery?
You can have your battery replaced by Apple’s official service or visit a reputable third-party repair provider. Ensure the service you choose has good reviews and can offer quality parts and service.
What is the average lifespan of an iPad Air 2 battery before it needs replacement?
An iPad Air 2 battery typically lasts for about 500 to 1,000 charge cycles before its performance significantly diminishes.
Are there any reliable video tutorials for replacing an iPad Air 2 battery?
Yes, there are detailed video tutorials available online that can guide you through the process. Look specifically for videos that walk you through each step and make sure they come from a credible source or have high ratings from viewers.
When deciding on a battery replacement, how do I determine if it’s worth it for an older iPad like the Air 2?
Consider the cost of replacement versus the device’s age and performance. If your iPad Air 2 still meets your needs, replacing the battery can be a cost-effective way to extend its life, especially if the price of a new iPad is significantly higher.

