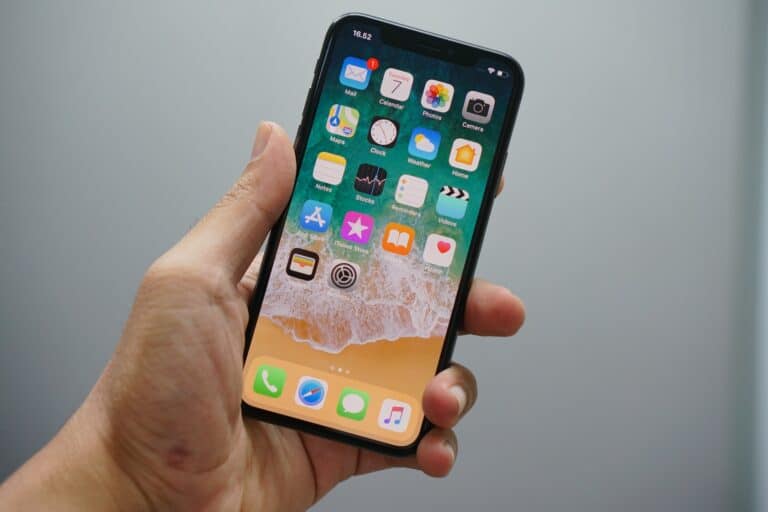
Have you ever come across those breathtaking slow-motion videos of water balloons bursting or dogs catching frisbees in mid-air? Well, you can create those videos too using your iPhone! The camera on your iPhone provides an effortless way to capture stunning slow-motion videos. Here’s a step-by-step guide on how to use it and some tips to get excellent results:
Capturing slow-motion video with your iPhone is a great way to add dramatic effect and cinematic flair to your clips. The process is straightforward, and your iPhone also provides powerful built-in tools to edit and fine-tune your slow-motion footage.
Here is a guide on how to shoot and edit slow-motion video on your iPhone.
1. Shoot a Slow-Motion Video
- Open the Camera app: Tap the Camera app icon on your home screen.
- Swipe to Slo-mo mode: At the bottom of the screen, swipe through the camera modes (Photo, Portrait, Video, etc.) until you find Slo-mo.
- Adjust Frame Rate (Optional): In the top right or left corner of the screen, you may see a frame rate option, such as “1080p HD at 120.” Tapping this will cycle through the available frame rates and resolutions.
- Higher frame rate (e.g., 240 fps) results in a slower, more detailed video, but also a larger file size.
- Lower frame rate (e.g., 120 fps) is still very slow but takes up less space.
- Start Recording: Tap the red circular Record button to begin filming. You can also use either of the volume buttons.
- Stop Recording: Tap the red square Stop button when you are finished. Your video will be saved automatically to your Photos app.
2. Edit Your Slow-Motion Video
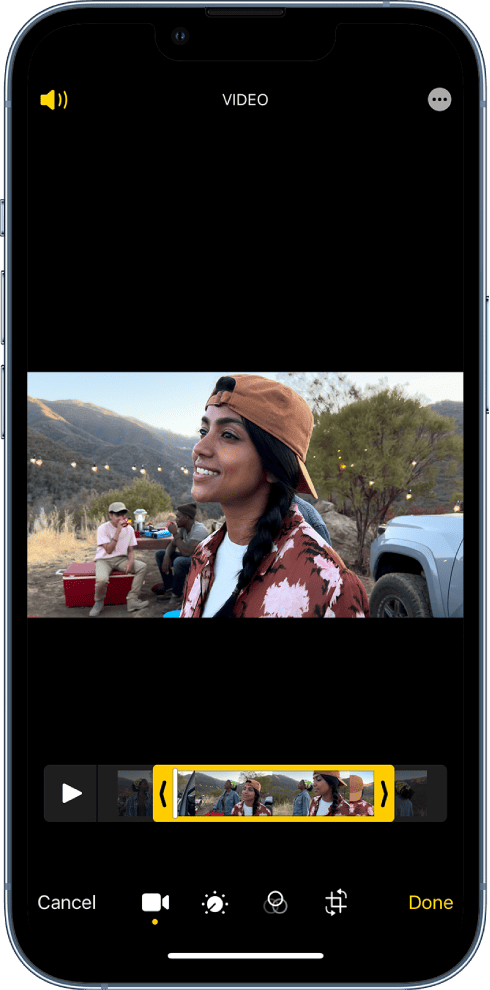
The beauty of the iPhone’s Slo-mo feature is that the video is not entirely slowed down by default. Instead, you can choose which sections of the video play in slow motion.
- Open the Photos App: Find and open the slow-motion video you just recorded.
- Tap “Edit”: In the top-right corner of the screen, tap the Edit button.
- Adjust the Slow-Motion Section: At the bottom of the screen, you will see a video timeline with two vertical bars. The space between these two bars is the part of the video that will play in slow motion.
- Drag the left vertical bar to set where the slow-motion effect begins.
- Drag the right vertical bar to set where the slow-motion effect ends.
- The rest of the video, outside of these bars, will play at normal speed.
- Finalize Your Edit: Once you have the slow-motion section adjusted to your liking, tap Done. You can choose to “Save Video” to overwrite the original or “Save Video as New Clip” to keep both versions.
Tips for Shooting Great Slo-mo Videos
- Lighting is Key: Slow-motion footage looks best in bright, well-lit environments. A higher frame rate requires more light, and shooting in a dimly lit area can result in a grainy or dark video.
- Capture Movement: Slow motion is most effective when there is clear and dynamic movement. Think of a splash of water, a person jumping, or a pet in motion.
- Stay Steady: Any shakiness will be exaggerated in slow motion. For the smoothest possible footage, use both hands or, for the best results, a tripod.
How to Shoot Slow Motion on iPhone
- Open your Camera app.
- Swipe to the “Slo-Mo” mode.
- Choose your desired frame rate: See the table below for options.
- Tap the red record button to start shooting your video.
- Tap the red button again to stop recording.
Frame Rate Options
Different frame rates produce effects with varying intensity. Here’s what you’ll find on compatible iPhones:
| Frame Rate | Description |
|---|---|
| 120 fps | The most common option, creates a smooth slow-motion effect. |
| 240 fps | Provides a more pronounced slow-motion effect, better for extremely fast-moving subjects. |
Tips for Great Slow Motion Videos
- Good Lighting is Key: Slow motion requires more light. Shoot in well-lit environments or outdoors for the best results.
- Steady Wins the Race: For smooth footage, keep your iPhone steady. Consider using a tripod or stabilizer.
- Think About the Moment: Slow motion works best for action-packed moments. Sports, water splashes, or other fast-moving scenes are excellent choices.
- Edit for Impact: Use the built-in editing tools in the Photos app to trim your video and adjust which sections are in slow motion.
Step By Step Overview
| Step | Action | Notes |
|---|---|---|
| 1 | Open Camera App | Tap the Camera icon on your iPhone. |
| 2 | Select ‘Slo-Mo’ Mode | Find the ‘Slo-Mo’ option along the bottom of the screen and swipe to select it. |
| 3 | Choose Frame Rate | Tap ‘Settings’ then ‘Camera’ and select ‘Record Slo-Mo’ to adjust frame rate (e.g., 120 fps, 240 fps). |
| 4 | Compose Shot | Aim your camera and think about the action you want to capture in slow motion. |
| 5 | Press Record | Hit the red record button to start, tap it again to stop. |
| 6 | Edit (Optional) | Tap the video thumbnail and then ‘Edit’ to adjust where the slow-motion effect starts and ends. |
Key Takeaways:
- Slow motion video on iPhones captures details and emotions, creates dramatic effects, and adds visual interest.
- Utilize natural lighting, experiment with angles and perspectives, and use a tripod or stabilizer for great slow motion videos on your iPhone.
- To edit slow motion videos on your iPhone, trim the footage, adjust the speed, and add music and effects. Avoid shaky footage, poor lighting, and overusing slow motion for the best results.
What is Slow Motion Video?
Imagine a raindrop hitting a puddle: In regular video, it’s gone in a flash. Slow motion reveals the splash like a tiny explosion! That’s the power of slo-mo.
What it lets you do:
- Amplify Drama: A tense moment before a goal is scored feels even bigger slowed way down.
- Make the Ordinary Magical: Things we take for granted, like a flower blooming, become amazing to watch.
- Turn Funny Moments into GIFs: Slo-mo dog fails are internet gold!
Good news: Your iPhone can do all this! It’s surprisingly easy, and the results are awesome.
How Does Slow Motion Work on iPhones?
Ready to make time stretch? It’s all about frames per second (that’s how many pictures your iPhone takes each second of video).
Here’s the trick:
- Normal Video: Around 30fps. Looks like real life.
- Slow-Mo: 120fps or higher! The extra frames mean things play back waaaay slower.
Your iPhone’s camera app lets you switch modes with a few taps. Simple as that!
What Are the Benefits of Shooting Slow Motion Video?
Why shoot slow-mo with your iPhone? Here’s the deal:
- Hidden Worlds: Ever see a bee’s wings in flight? Slow-mo reveals stuff your eyes normally miss.
- Superpower for Any Video: Just 5 seconds of slo-mo makes a birthday, sports clip, etc., way more epic.
- No Pro Skills Needed: Phone does the hard work, you just hit record. (Seriously, it’s that easy.)
- Goodbye, Shaky Videos: Your iPhone’s magic keeps slow-mo footage smooth, even if your hands aren’t rock-steady.
Captures Details and Emotions
Remember that viral video of the kid blowing out birthday candles, and you see the spit fly in slow-mo? That’s the power of the iPhone in your pocket!
What slow-mo does:
- Makes you look closer: Tiny details, the way a face changes when someone laughs… it’s suddenly fascinating.
- Turns laughs into art: Clumsy pets, water fights… everyday fun becomes a mini-movie masterpiece.
- More than just funny: It can make a goal, a first dance, or even just leaves falling seem important and beautiful.
Creates Dramatic Effect
Imagine your dog catching a frisbee: Normal speed, it’s over in a blink. Slo-mo, you see every muscle straining, tongue flopping… it’s like a mini action movie!
That’s how slo-mo adds drama:
- Stretch the BIG moment: The seconds before a splash, a finish line, a kiss… way more suspenseful slowed down.
- Notice the details: Sweat flying, faces straining… it makes it feel more intense, even if it’s just kids playing.
- Phone does the hard work: You don’t need fancy filmmaking skills to make something awesome.
Adds Visual Interest
Think of slow motion as a magic trick for your videos! It makes you look twice at the most ordinary things…
Here’s what it does:
- Wonder in the everyday: Raindrops, autumn leaves, even bubbles being blown – suddenly mesmerizing.
- Superpower for your memories: A belly laugh, a game-winning goal… slow-mo makes them even more epic to rewatch.
- It’s about FEELING: A tense moment, a surprised face, even a goofy grin – emotions get amplified.
The best part? Your iPhone makes it SO easy. Try it, and you’ll be hooked!
How to Set up Your iPhone for Slow Motion?
Ready to get those awesome slow-mo videos? Here’s how to tweak your iPhone camera for the best results:
- Frame Rate: This is how many pictures it takes per second. Higher number = smoother slow motion. (But takes up more space!)
- Resolution: How sharp the picture is. If detail matters, go high. If you just want fun slo-mo, lower resolution is fine.
- Mode Matters:
- Video: Normal slow motion
- Time-lapse: Super-sped-up PLUS slow-mo parts – cool for clouds, traffic, etc.
Set Up iPhone for Slow Motion
| Step | Action | Notes |
|---|---|---|
| 1 | Open the Camera app | |
| 2 | Swipe to “SLO-MO” mode | Might be at the bottom, or in a list if swiping sideways |
| 3 | Choose frame rate | Options usually include 120fps and 240fps. Higher = smoother, but take more space |
| 4 | Choose resolution | Options like 1080p or 720p. Higher = sharper, but take more space |
| 5 | Hit record! | * Aim for steady hands or use a tripod for the best results. * Consider your background – simple is best for dramatic slow-mo. * Experiment with different speeds and subjects! |

Choosing the Right Camera Mode
Your iPhone’s camera isn’t just for normal videos! It has special modes designed for slow-motion, which do way more than just slow things down.
Here’s the basics:
- Slow-Mo Mode: This is your go-to for sports, animals, anything with fast movement. Makes it smooth and dramatic.
- Time-lapse Mode: Speeds things up AND has a slow-mo effect – cool for sunsets, flowers opening, etc.
- That ‘240fps’ Thing: Means extra smooth slow motion. Use it for stuff with REALLY intricate detail.
Experiment and get creative! That’s how you find what makes your videos awesome
Adjusting the Frame Rate
Ever see those slo-mo videos where every tiny movement is clear, versus ones that look jerky? That’s all about frame rate!
Basically, it’s how many pictures your iPhone takes per second:
- Low Frame Rate: Choppy, less detailed slow motion (but smaller files)
- High Frame Rate: Super smooth, shows every detail (but eats up storage fast!)
What to pick depends on what you’re filming:
- Fast stuff: Sports, kids being crazy, etc. Needs the highest setting your phone has.
- Gentle movement: Waves, clouds… lower frame rate is fine and saves space.
Setting the Focus and Exposure
Slo-mo isn’t just about the speed – it needs to look sharp and clear too! That means focus and exposure matter.
Focus:
- Tap the screen where you want the detail. Slo-mo highlights every blur, so be picky!
- Moving stuff is HARD: Your iPhone will try to keep up, but may need help.
Exposure (how bright it is):
- Slo-mo needs good light: Dark videos get grainy when slowed down. Shoot outside or add more light if indoors.
- Check your settings: Some iPhones auto-adjust for video, but you can also do it manually for tricky lighting.
Tips for Shooting Great Slow Motion Videos with Your iPhone
Remember that viral video of the dog shaking off water in slo-mo? You can do stuff like that with your iPhone!
Here’s how to make your videos awesome:
- Get Creative with Angles: Don’t just film straight-on. Shoot down low to make things look HUGE, or from above for a cool pattern.
- Details Matter: Slo-mo reveals tiny things we miss – try close-ups on faces, insects, even food cooking!
- Use Your iPhone’s Powers: That image stabilization thing keeps slow-mo from looking shaky, so you can move the camera more.
It’s about playing around and seeing what you discover!
Use a Tripod or Stabilizer
Ever try to watch slo-mo that’s all shaky? It’s a bummer! Good news: tripods are your new best friend.
Why they’re worth it:
- Slo-mo + Blur = Yuck: Stabilized videos have that crisp, dramatic look you want.
- Not just for pros: Even a small, cheap tripod makes a HUGE difference.
- More than just still shots: Lets you walk slowly with the phone, pan across a scene, etc.
Tripods open up all sorts of cool possibilities for your slo-mo videos!

Experiment with Different Angles and Perspectives
Think of famous slo-mo scenes – did they all film straight ahead? Nope! Angles make it way more interesting…
Here’s what to try:
- Get down low: Makes things look powerful. Great for puddles, kids, pets…
- Straight-up overhead: Turns everyday stuff into cool patterns (waves, people walking, even making pancakes!)
- Makes you think differently: Slo-mo is about details, and weird angles show you ones you’d normally miss.
It’s not about perfect shots, it’s about seeing the world in a new way!
Utilize Natural Lighting
Slo-mo + bad lighting = blurry mess! Good news is, you DON’T need studio lights to get awesome videos.
What natural light gives you:
- Detail: Slow-mo is all about seeing what you normally miss… needs good light to work.
- Smooth, not grainy: Natural light is flattering, makes skin, water, etc. look amazing when slowed down.
- ‘Movie Magic’ feeling: Think golden hour, dappled light through leaves… easy to make slo-mo look artistic.
Simple tips:
- Windows are your friend: Even indoors, film near them!
- Best time outdoors: Overcast days are great, or early morning/late afternoon on sunny ones.
How to Edit Slow Motion Videos on Your iPhone?
Think of editing as the magic touch for your slow-mo videos! Here’s what it can do:
- Cut out the boring bits: Took too long to get to the good part? Snip, snip!
- Crank the drama WAY up: Adding slow parts to a normal speed clip is a classic trick.
- Music makes a HUGE difference: Pick a song that matches the mood, makes even simple slo-mo feel epic.
Good news: you don’t need to be a pro. Apps like iMovie are built for phones, so they’re easy to learn. Play around and see what you like
Trimming the Video
Ever notice how some slo-mo videos drag at the beginning or end? Trimming fixes that!
What it does:
- Cuts out awkward bits: The splash happened, now slow-mo the GOOD part, not the setup.
- Keeps it exciting: Dull moments in slo-mo feel extra dull. Snip ’em out, keep the action flowing.
- You can be super precise: Most editing apps let you go frame-by-frame, so it’s easy to get the exact spot you want.
Don’t be afraid to experiment – you can always undo if you don’t like it!
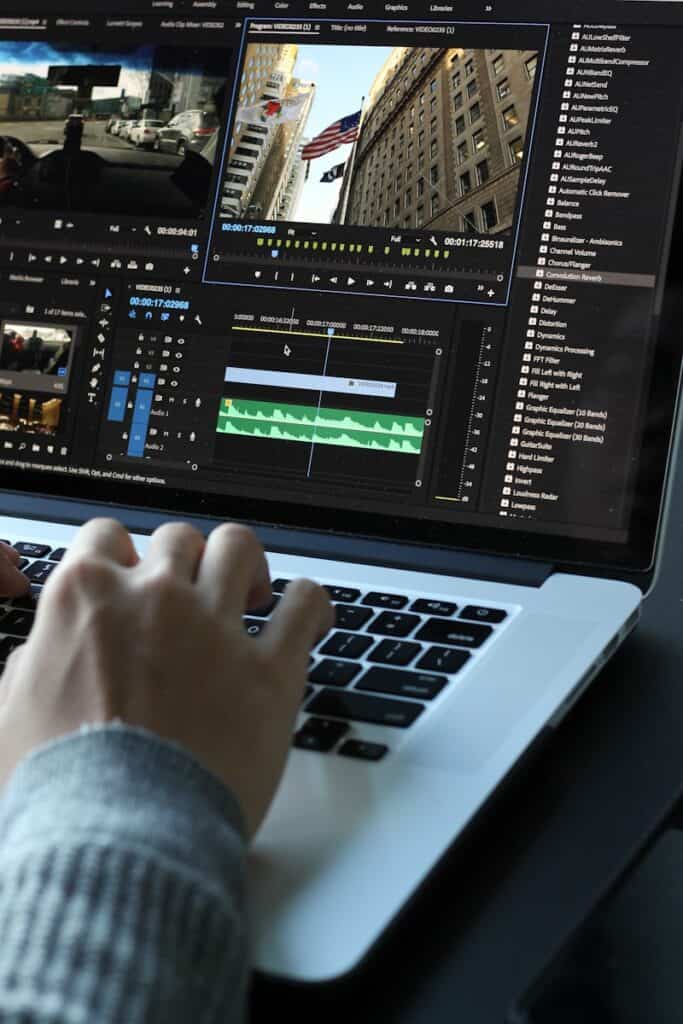
Adjusting the Speed
Think of the best slo-mo videos… they don’t just slow EVERYTHING down, right? They play with speed for maximum impact.
Here’s what it lets you do:
- Build tension: Normal speed, then slo-mo right BEFORE the big moment… makes it way more exciting.
- Funny gets funnier: Speeding up clumsy pets, kids falling, etc., is classic for a reason!
- More than just tricks: Think of a dance – slo-mo shows the beauty, fast parts show the energy.
Good news: Editing apps make this easy! Look for the ‘speed’ setting and experiment!
Adding Music and Effects
Music makes good slow-mo AMAZING! Here’s why you should try it:
- Crank up the drama: Big action moment? Powerful music makes it hit way harder, even in slow motion.
- Funny gets funnier: Add silly sound effects to clumsy pets, kids falling… instant YouTube gold!
- It’s about FEELING: Background music can make a simple slo-mo of leaves falling seem sad, happy, etc.
Don’t worry, you don’t need to be a musician. Editing apps make it easy to add tracks, and many even have music sorted by mood to get you started.
What Are Some Common Mistakes to Avoid?
Ever tried to watch shaky, dark slo-mo? Not fun! Luckily, there are easy ways to avoid that:
- Stop the wiggle: Tripods are your friend, even cheap ones help A LOT. Or, lean the phone against something sturdy.
- Slo-mo needs good enough light: Outdoors on a sunny day is ideal. Indoors, get near a window or add lamps.
- Less is more: Slo-mo for EVERYTHING gets boring. Save it for the moments that really matter, makes them way more powerful.
Shaky Footage
Slo-mo + shaky hands = blurry mess! Here’s how to fix it, from easiest to fanciest:
- Basics matter: Hold the phone steady with BOTH hands, elbows tucked in. Lean it against something if possible.
- Shoot a bit wider: Gives you room to crop the edges later in editing, hiding small wobbles.
- Your phone might help: Look for “stabilization” settings, or just see if newer models shoot less shaky videos in general.
- Serious about slo-mo? A tripod is your best friend. Even cheap ones make a huge difference.
- Big budget option: Gimbals are those robot-arm things pros use… awesome, but pricey.
Poor Lighting
Ever try to film slo-mo indoors and it looks like a blurry mess? That’s bad lighting! Here’s the fix:
- Go towards the light: Windows, sunny spots outdoors… the brighter the better for slow motion.
- Timing is everything: Overcast days are actually great for filming, or early morning/late afternoon when it’s not super harsh.
- Your phone has settings: Look for the little sun icon and slide it – this is exposure. Brighter = sharper slo-mo.
It’s amazing how much of a difference these little changes make!
Overusing Slow Motion
Remember that time you saw a video where EVERYTHING was in slow motion? Kinda got old fast, right?
That’s why less is more with slo-mo. It’s tempting to use it all the time at first, but here’s the secret:
- Save it for the WOW moments: The splash, the big grin, the confetti explosion… slo-mo makes them even cooler.
- Normal speed makes it pop: Having a mix of speeds is way more interesting to watch.
- Makes YOU a better filmmaker: Forces you to think about what REALLY matters in the video, not just what looks neat.”
Let me know if you’d like any of the points expanded, or additional tips included!
Conclusion: Tips for Creating Amazing Slow Motion Videos with Your iPhone
Ready to blow minds with your slow-mo videos? Here’s the deal:
- Tech matters, but it’s not scary: Experiment with frame rates, check out basic editing… you’ll learn more by playing around than reading how-to’s!
- Make it artistic: Think about the lighting, how you frame the shot… slo-mo + good composition = magic.
- Sound is your secret weapon: Even free editing apps let you add music, which takes good slo-mo to the NEXT level.
Most importantly, just go shoot stuff! Even silly little videos teach you a ton, and that’s how you find YOUR style.
Frequently Asked Questions
Can I shoot slow motion video with my iPhone?
Yes, you can shoot slow motion video with your iPhone by using the built-in slow motion feature in the camera app.
How do I access the slow motion feature on my iPhone?
To access the slow motion feature on your iPhone, open the camera app, swipe to the “Slo-Mo” mode, and start recording.
What settings should I use for shooting slow motion video with my iPhone?
It is recommended to use a higher frame rate, such as 120 or 240 frames per second, for the best slow motion effect on your iPhone.
Can I edit the slow motion video after I have shot it?
Yes, you can edit the slow motion video on your iPhone using the Photos app. Simply open the video, select “Edit” and adjust the slow motion settings to your preference.
How can I make sure my slow motion video is not too shaky?
To avoid a shaky slow motion video, make sure to stabilize your iPhone by using a tripod or holding it steady with both hands while recording.
Is there a limit to the length of slow motion video I can shoot on my iPhone?
Yes, there is a limit to the length of slow motion video you can shoot on your iPhone. The maximum length is determined by the available storage on your device.


