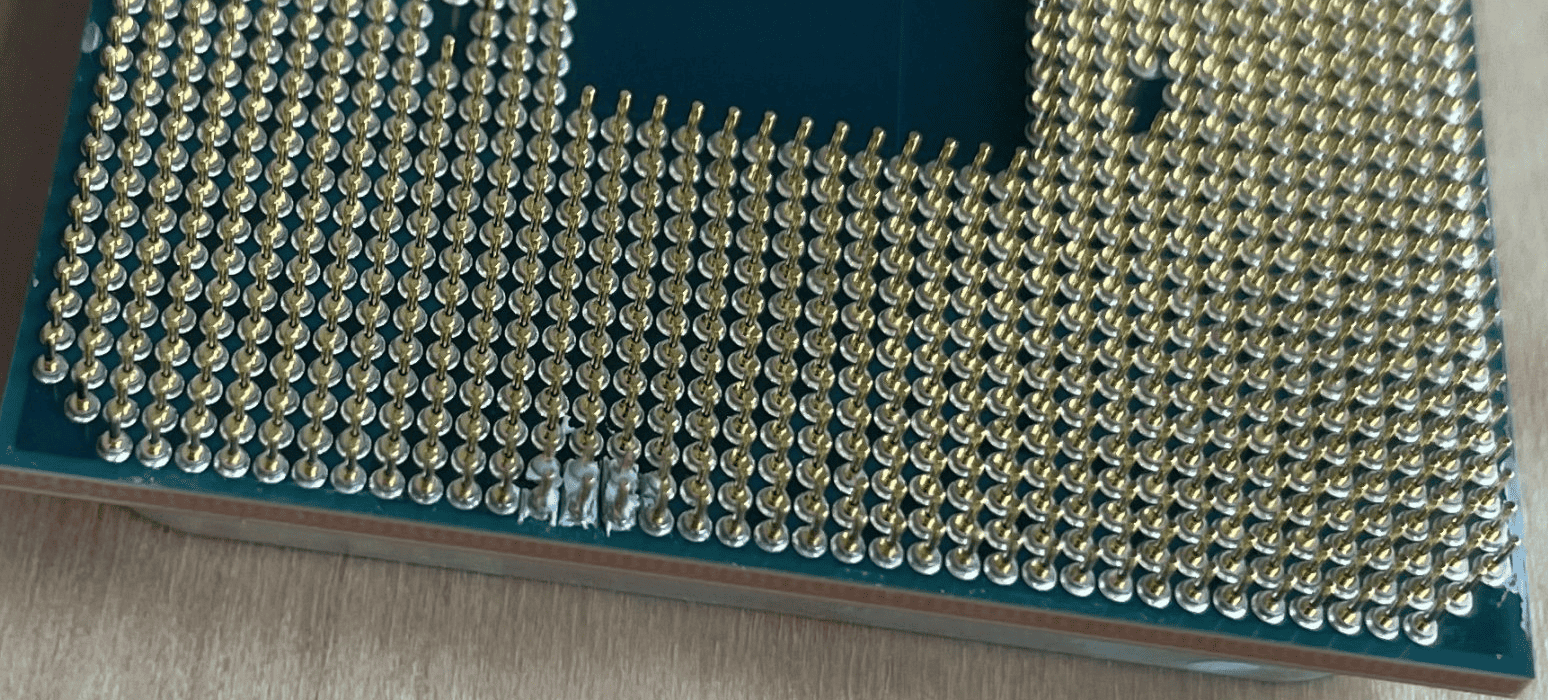
Getting thermal paste on CPU pins happens more often than most people think, especially during first-time builds or cooler installations. This sticky situation can cause poor connections, system instability, or even prevent your computer from starting if the paste is electrically conductive.
You can safely clean thermal paste off CPU pins using 70% isopropyl alcohol, a soft toothbrush, and careful technique to avoid bending the delicate pins. The cleaning process requires patience and the right materials, but it can save you from expensive hardware replacements. Different CPU socket types like LGA and PGA require slightly different approaches, but both can be cleaned effectively.
The key lies in understanding whether your thermal paste conducts electricity and following proper safety steps. With the right knowledge about cleaning agents, tools, and techniques, anyone can restore their CPU pins to working condition without damaging expensive components.
How to Clean Thermal Paste Off of CPU Pins: Step-by-Step Guide
Cleaning thermal paste off CPU pins is a delicate but important task to ensure your CPU functions properly without electrical shorts or damage. Here’s a safe and effective method to do it:
What You’ll Need:
- Isopropyl alcohol (preferably 90% or higher)
- Cotton swabs (Q-tips)
- Lint-free cloth or microfiber cloth
- A clean, static-free workspace
- Optional: A soft brush (like a small paintbrush or anti-static brush)
Step 1: Power Off and Prepare
- Ensure your computer is fully powered down and unplugged.
- Remove the CPU carefully from the motherboard if not already done.
Step 2: Apply Isopropyl Alcohol
- Dampen a cotton swab with a small amount of isopropyl alcohol. Avoid soaking it to prevent excess liquid.
- Gently dab and wipe the thermal paste off the CPU pins. Use light pressure to avoid bending or damaging pins.
Step 3: Clean Between Pins
- For paste stuck between pins, use a lightly moistened cotton swab or a soft brush to carefully remove residue.
- Be patient and thorough, as leftover paste can cause shorts or improper contact.
Step 4: Dry and Inspect
- Use a dry lint-free cloth or a fresh, dry cotton swab to gently dry the pins.
- Inspect under good light or magnification to ensure all paste is removed and pins are straight.
Step 5: Let It Fully Dry
- Allow the CPU to air dry for a few minutes to ensure all alcohol has evaporated before reinstalling.
Important Tips:
- Use only isopropyl alcohol, as it evaporates quickly and won’t leave residue.
- Avoid using water or household cleaners which can damage components.
- Handle the CPU by its edges to avoid static or physical damage.
- Do not apply thermal paste directly on pins; it belongs only on the CPU heat spreader surface.
- If pins are bent, carefully straighten them with a mechanical pencil or similar tool before cleaning.
Following these steps will help maintain your CPU’s performance and prevent electrical shorts caused by misplaced thermal paste on the pins.
Key Takeaways
- Clean CPU pins with 70% isopropyl alcohol and a soft toothbrush to remove thermal paste safely
- Never power on your system if conductive thermal paste touches the pins to avoid permanent damage
- Allow 24 hours of drying time after cleaning before reinstalling the CPU
Frequently Asked Questions
Cleaning thermal paste from CPU pins requires specific methods and materials to avoid damage. Understanding the right cleaning agents, safety steps, and potential computer issues helps ensure successful paste removal.
What is the recommended method for removing thermal paste from CPU pins?
Use 99% isopropyl alcohol with a soft-bristled toothbrush or cotton swab. Apply a small amount of alcohol to the cleaning tool.
Gently brush or wipe the pins in one direction. Avoid applying too much pressure to prevent bending the delicate pins.
For large chunks of paste, use a toothpick to carefully remove them first. Then follow with the alcohol and brush method.
Let the CPU dry completely before installing it back into the socket.
Are there household items that can safely clean thermal paste off CPU pins?
Rubbing alcohol with at least 70% concentration works for cleaning CPU pins. Higher concentrations like 99% work better and evaporate faster.
Soft-bristled toothbrushes help remove stubborn paste without damaging pins. Cotton swabs or Q-tips work for gentle wiping.
Avoid using cotton balls or tissues that leave fibers behind. Do not use water, soap, or other household cleaners on CPU pins.
Can using the wrong cleaning solution damage CPU pins when removing thermal paste?
Yes, wrong cleaning solutions can damage CPU pins and the motherboard. Water-based cleaners can cause corrosion and electrical problems.
Harsh chemicals can eat away at the metal coating on pins. Low-concentration alcohol may not dissolve paste effectively and leave residue.
Conductive cleaning agents can create short circuits when the computer powers on. Stick to high-concentration isopropyl alcohol for safe cleaning.
What precautions should I take when cleaning thermal paste from the CPU socket?
Turn off the computer and unplug all cables before starting. Remove the CPU carefully from the socket to avoid pin damage.
Ground yourself by touching a metal part of the computer case. This prevents static electricity from damaging sensitive parts.
Use a magnifying glass to see small amounts of paste clearly. Work in good lighting to avoid missing spots or damaging pins.
Handle the CPU by its edges only. Never touch the pins directly with fingers.
How can I ensure no residue is left after cleaning thermal paste from CPU pins?
Use multiple cotton swabs with fresh alcohol for thorough cleaning. Check each pin under good lighting or with a magnifying glass.
Wipe in different directions to catch any remaining paste. Use a dry cotton swab after cleaning to remove excess alcohol.
Let the CPU air dry for several minutes before installation. Compressed air can speed up the drying process if available.
Inspect the pins one final time before putting the CPU back in the socket.
Is it possible for thermal paste on CPU pins to prevent the computer from booting, and how can it be resolved?
Yes, thermal paste on CPU pins can stop computers from starting up. The paste blocks electrical connections between the CPU and motherboard.
Conductive thermal paste creates short circuits that damage components. Non-conductive paste still prevents proper electrical contact.
Remove the CPU and clean all paste from the pins using isopropyl alcohol. Check the motherboard socket for paste and clean it too.
Test the computer after cleaning and drying all components completely. If problems continue, the paste may have caused permanent damage.

