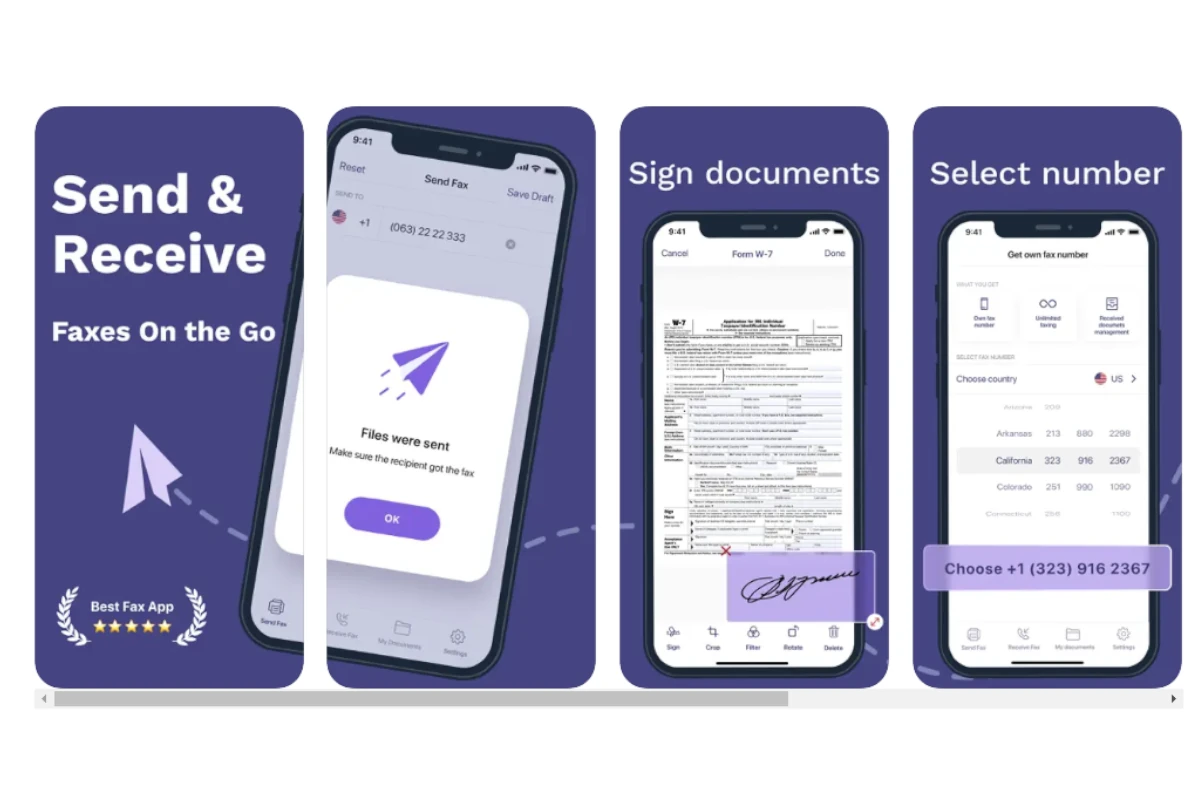
Sending a fax from an iPhone is easier than ever with today’s technology. Many apps in the App Store let you send faxes right from your device. To fax from your iPhone, simply download a fax app, scan or attach your document, and send it to any fax number with just a few taps.
You can choose between free and paid fax apps. Make sure to pick one that fits your needs and has good reviews. Apps like eFax, Fax.Plus, and iFax are popular options that many users find reliable.
Using your iPhone for faxing saves time and costs associated with traditional fax machines. Plus, it allows you to send important documents from anywhere. This convenience makes it a great tool for both personal and business use.
Faxing Made Easy: A Guide for iPhone Users
Fax Apps: Your Digital Fax Machine
You don’t need a bulky fax machine to send faxes from your iPhone. Many apps turn your phone into a portable fax machine. Some popular options include:
- eFax: Easy to use, lets you send and receive faxes
- Fax.Plus: Offers a free trial and works worldwide
- FAX from iPhone: Fax App: Simple interface, good for occasional faxes
These apps usually require a subscription, but many offer free trials or a limited number of free faxes.
Step-by-Step: Sending a Fax with an App
- Download and install: Choose a fax app from the App Store and install it.
- Create an account or start a free trial: Most apps require you to sign up.
- Enter the recipient’s fax number: Double-check for accuracy!
- Prepare your document: You can often take a photo of the document or choose one from your files.
- Add a cover page (optional): Some apps let you create a cover page with a message.
- Review and send: Take a final look before hitting the send button.
Online Fax Services: Another Option
If you don’t want to use an app, some online services let you send faxes from your iPhone’s web browser. These services usually work similarly to the apps:
- Choose an online fax service: Popular choices include eFax, FaxZero, and HelloFax.
- Upload your document: You can usually drag and drop or choose a file from your phone.
- Enter the recipient’s fax number: Make sure it’s correct.
- Send the fax: Click the send button, and the service will handle the rest.
Important Tips for Faxing from Your iPhone
- Check the cost: Some apps or services have fees, especially for international faxes.
- Confirm delivery: Most apps or services will notify you when your fax is delivered.
- Use a clear image or document: A blurry image or document can be hard to read on the other end.
- Consider privacy: Choose a reputable app or service that protects your information.
Key Takeaways
- Download a fax app from the App Store.
- Scan or attach the document to be faxed.
- Send the fax directly from your iPhone.
Setting Up Your iPhone for Faxing
Users need a suitable fax app and a fax number to send faxes from an iPhone. This section discusses selecting the right app and creating an account to get a fax number.
Selecting the Right Fax App
Choosing the right app is crucial for a good faxing experience. Some popular fax apps for iPhone include eFax, iFax, Genius Fax, and Tiny Fax. Each app offers different features and pricing plans.
Users should look for apps with high user ratings and positive reviews. Free trials allow users to test the app before committing to a paid plan. Some apps also offer free basic services with the option to upgrade for more features.
Ease of use and compatibility with other storage services can also be important. For instance, an app that integrates with iCloud Drive or Dropbox can make sending documents easier.
Creating an Account and Obtaining a Fax Number
After selecting an app, the next step is to create an account. Users will need to provide an email address and set up a password. Some apps may require additional information like a phone number.
Once the account is set up, users can get a fax number. Some apps provide a free fax number, but more commonly, users will need to subscribe to a plan to get a toll-free or personalized fax number.
It’s important to choose a subscription plan that fits individual needs, whether it’s a pay-per-fax, monthly, or annual plan. Some apps offer HIPAA-compliant services, which can be necessary for sending sensitive information.
Frequently Asked Questions
Sending a fax from an iPhone is convenient with the right apps. Here are answers to some common questions about this process.
How can I send a fax from my iPhone without using an app?
It is not possible to send a fax from an iPhone without using an app. Faxes need special protocols that apps provide. Traditional email services do not support faxing.
Is there a way to fax a document directly from the Notes app on my iPhone?
There is no direct way to fax from the Notes app. You need to use a fax app. First, save the note as a PDF, then upload it to the fax app.
What is the best fax app to use on an iPhone?
Several fax apps work well, including eFax, Fax.Plus, and iFax. They offer easy interfaces and reliable service. Choose one based on your needs and read reviews.
Is it possible to send a fax from an iPhone for free?
Yes, some apps allow limited free faxing. For example, Fax.Plus allows free faxes but has limits on pages. Check the app’s details for any restrictions.
Can you recommend any free fax apps for iPhone that are effective?
Fax.Plus and eFax offer free versions. They let you send a few pages without charge. These apps are easy to use and reliable.
How do I scan a document with my iPhone and send it via fax?
Use the built-in camera or a scanning app to scan documents. Save the scan as a PDF. Then, upload the PDF to a fax app to send it.

