Reverse image search is the process of using an image (instead of text) to find related information online—such as the source, similar images, or where else that image appears. This is useful for:
- Verifying authenticity (e.g., fact-checking a viral photo).
- Finding higher-resolution versions of an image.
- Tracking unauthorized use of your photos.
- Identifying products, places, or people.
1. Traditional Reverse Image Search Methods
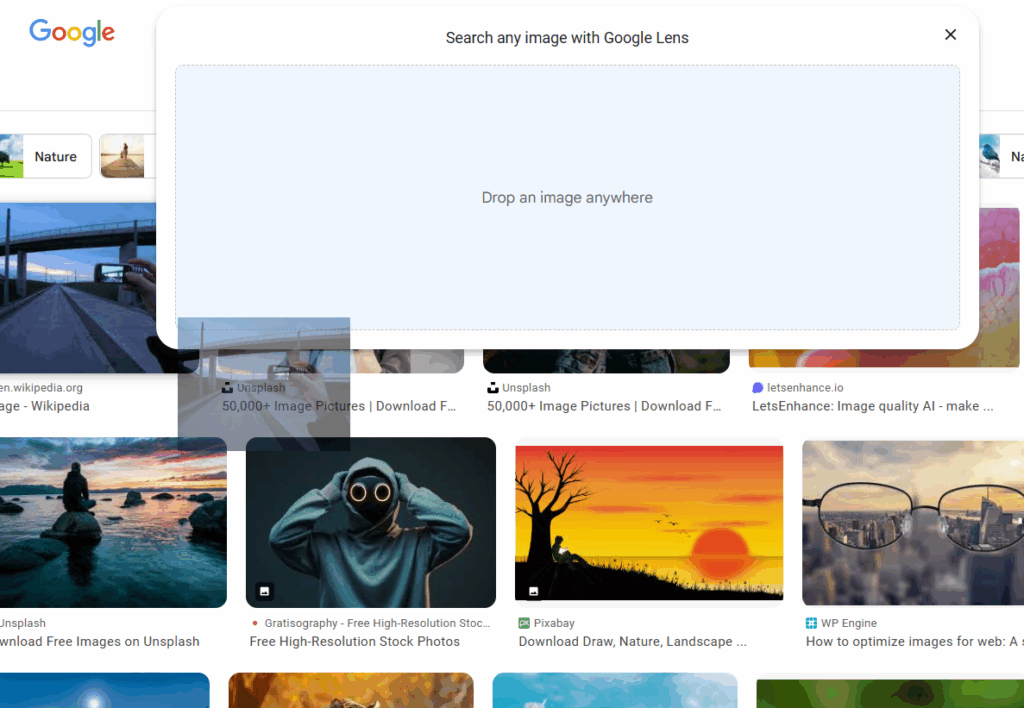
Google Images
- Go to Google Images.
- Click the camera icon.
- Upload an image or paste an image URL.
- Google will show visually similar results and related websites.
Pros: Free, widely used.
Cons: Limited accuracy with faces and niche images.
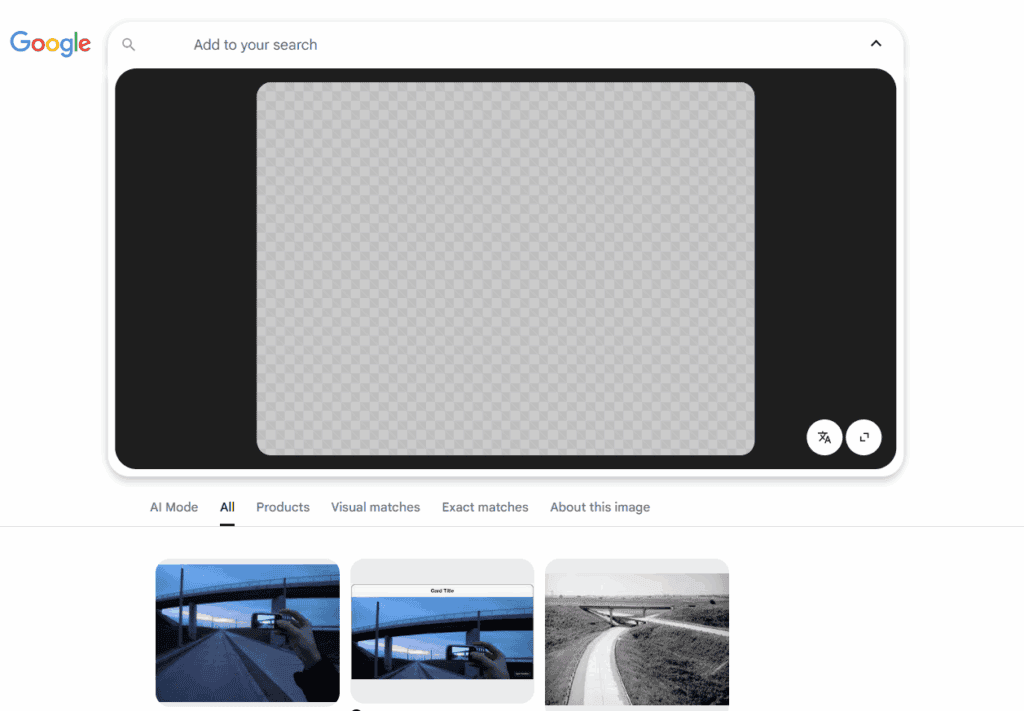
Bing Visual Search
- Visit Bing Visual Search.
- Upload or drag an image.
- Bing identifies objects, products, and similar images.
Pros: Good for shopping/product recognition.
Cons: Database smaller than Google’s.
Yandex Images
- Go to Yandex Images.
- Upload an image.
- Yandex is particularly strong at finding duplicates and older images.
Pros: Excellent for finding obscure or Eastern European sources.
Cons: Interface less polished.
2. AI-Powered Reverse Image Search Tools (2025)
AI-based tools use computer vision + machine learning to go beyond simple pixel matching. They can recognize faces, objects, brands, and contexts with much higher accuracy.
1. Reversely.ai
- Website
- Specializes in faces, objects, and places.
- Finds visually similar results even if the image is cropped, edited, or filtered.
Best for: People search, finding altered images.
2. Lenso.ai
- Website
- AI-powered search that detects contextual similarities beyond exact matches.
- Good for creative professionals, designers, and content verification.
Best for: Finding stylistically similar images, creative inspiration.
3. PimEyes
- Website
- Face recognition search engine.
- Upload a face photo, and it scans the web for matches.
Best for: Identifying where your face appears online, protecting privacy.
Note: Ethical concerns exist—use responsibly.
4. Copyseeker
- Website
- Detects duplicate images and unauthorized usage.
- Useful for photographers, brands, and businesses protecting copyrights.
Best for: Copyright enforcement.
5. AI Mojo’s Top Tools
AI Mojo lists multiple AI reverse image search platforms for different needs (source: AI Mojo).
3. Step-by-Step: How to Perform a Reverse Image Search
- Choose a tool (Google for general, Reversely.ai for faces/objects, PimEyes for people).
- Upload your image (drag and drop, or paste a URL).
- Review results:
- Check websites where the image appears.
- Look for similar or altered versions.
- Verify authenticity (metadata, context).
- Take action if needed:
- Contact site owners for credit/removal.
- Use results for fact-checking or research.
4. Tips for Better Results
- Try multiple tools—no single engine covers the entire web.
- Use cropped versions (focus on the subject).
- Test with different resolutions of the same image.
- For faces, use PimEyes or Reversely.ai. For products, try Bing Visual Search.
✅ In summary:
- Use Google/Yandex for general searches.
- Use AI tools (Reversely.ai, Lenso.ai, PimEyes, Copyseeker) for advanced recognition, face search, and copyright protection.
Reverse Image Search Tools Comparison (2025)
| Tool | Type | Key Features | Best Use Cases | Pricing* |
|---|---|---|---|---|
| Google Images | Traditional | Upload or paste URL, finds visually similar images & websites | General searches, finding sources, fact-checking | Free |
| Bing Visual Search | Traditional | Strong product recognition, shopping integration | Identifying products, e-commerce | Free |
| Yandex Images | Traditional | Excellent for duplicates, older images | Tracking memes, obscure/archived images | Free |
| Reversely.ai | AI-powered | Advanced face/object recognition, works with cropped/edited photos | People search, finding altered images | Freemium (paid tiers for more searches) |
| Lenso.ai | AI-powered | Contextual similarity search, style recognition | Designers, creative inspiration, content verification | Freemium |
| PimEyes | AI-powered | Face recognition across the web | Privacy monitoring, identity protection | Paid (daily/weekly/monthly plans) |
| Copyseeker | AI-powered | Detects duplicates & unauthorized use | Copyright enforcement, protecting brand assets | Paid (subscription) |
*Pricing varies—most AI tools offer free trials with limits, then charge per search or via subscription.
✅ Quick Recommendations:
- For general use: Google Images or Yandex.
- For shopping/products: Bing Visual Search.
- For faces: PimEyes (privacy monitoring) or Reversely.ai.
- For creative search: Lenso.ai.
- For copyright protection: Copyseeker.
Reverse Image Search On Chromebook
Reverse image searching is a helpful tool for Chromebook users who want to search the internet using pictures rather than words. This function allows individuals to locate the source of an image, discover similar images, or gather more information about the picture at hand. For Chromebook users, this process is straightforward, thanks to the integration of Google Chrome and Google Images, which facilitate reverse image searches directly from the browser.
A reverse image search on a Chromebook is performed using Google Images. Users can initiate a search by accessing Google Images, clicking on the camera icon to “Search by image,” and then either uploading the image directly or pasting its URL. This feature is particularly useful for students, educators, and professionals who may need to verify the source of an image, find visual content that is free to use, or identify the content of an unknown picture.
Key Takeaways
- Reverse image search is accessible directly through Google Chrome on a Chromebook.
- Users can upload an image or paste its URL on Google Images to begin the search.
- This feature is handy for source verification, finding copyright-free images, or identifying unknown pictures.
Conducting a Reverse Image Search on Chromebook
Chromebooks offer straightforward ways to perform a reverse image search. This lets you discover more about an image, like its origin or if it appears elsewhere on the internet.
Using Google Images
To start a reverse image search on your Chromebook, first open Google Images in your browser. Here, look for the camera icon in the search bar. By clicking this, you’re given the option to either paste a URL of an image or upload a file directly from your Chromebook. After you’ve chosen or pasted your image, press “Search” and Google will display where else the image is found on the web or similar images.
Google Lens Integration
Google Lens offers a more dynamic way to search using images directly within your Chrome browser. When you find an image online, right-click on it and select “Search image with Google Lens.” A sidebar will appear showing visually similar images and related content. If you’re using the Google app on a device like an Android phone or iPhone, tap the Lens icon next to the search bar to utilize this feature.
Browser Extensions and Tools
In addition to Google’s tools, various browser extensions and third-party software are available to perform reverse image searches. These tools can integrate with the Chrome browser to give you reverse search capabilities using different search engines, not just Google. After installing an extension, usually, you can right-click on an image and select the related extension to start the search process. This is helpful if you’re looking for specialized or more extensive search results that Google can’t provide.
Chromebook-Specific Features and Tips
Chromebooks offer unique capabilities for reverse image searching that distinguish them from PCs and Macs. This section introduces special features and instructions to maximize your Chromebook’s functionality for image searching.
Utilizing Chrome Flags
Chrome flags are experimental features not yet part of the main Google Chrome menu but can significantly enhance your browsing experience on a Chromebook. To activate flags, type chrome://flags in your browser’s address bar and hit enter. Look for flags related to image search enhancement for additional functions that aren’t readily available. Be cautious, as these features are in testing and their stability may vary.
Image Search Shortcuts and Permissions
Chromebooks come with keyboard shortcuts that can speed up your image searching tasks. For instance, pressing Ctrl + (the mouse’s ‘right-click’) on an image will bring up a contextual menu where you can select “Search Google for Image” directly. This trick saves you time and streamlines your search process.
In terms of permissions, when conducting a reverse image search, Google Chrome may ask for certain permissions, like accessing your image files on your Chromebook. Grant these requests to allow for a seamless search experience. Be sure to review permissions for apps and extensions too, ensuring they’re only from trusted sources to maintain your device’s security.
Frequently Asked Questions
Reverse image search is a handy tool for finding the origin of an image, discovering similar images, or confirming the content. Chromebooks offer a simple way to perform this search through different methods and applications.
Can I perform a reverse image search on a Lenovo Chromebook, and if so, how?
Yes, on a Lenovo Chromebook, you can conduct a reverse image search similarly to any other Chromebook. Right-click on the image or press and hold the trackpad until a menu appears. Then, select “Search Google for Image” to start the search.
What are the steps for conducting a reverse image search from within Google Docs?
For searching an image from Google Docs, right-click the image and select “Copy.” Open https://images.google.com, click the camera icon, and then choose “Paste Image URL” or upload the copied image to search.
How can I do a reverse image search directly from Google Slides?
In Google Slides, right-click the image in your presentation and select “Copy.” Go to https://images.google.com, click the camera icon, and select either “Paste Image URL” or upload the copied image to start the search process.
Is there a Chrome browser extension for reverse image searching, and how can I use it on my Chromebook?
Chrome browser extensions like “Search by Image” can simplify reverse image searching. After installing the extension from the Chrome Web Store, right-click on any image to find an option for a reverse image search provided by the extension.
What methods are available to do a reverse image search on a Chromebook without using Google?
Alternative methods for reverse image search on a Chromebook include using third-party websites like TinEye. Upload the image to the website’s search tool, and it will find matches for the image across the web.
How can I activate or enable the reverse image search feature in Google Chrome on a Chromebook?
The reverse image search feature is typically active by default in Google Chrome. Right-click on an image or press the trackpad and hold, and look for the “Search Google for Image” option in the menu that appears to initiate the search.

