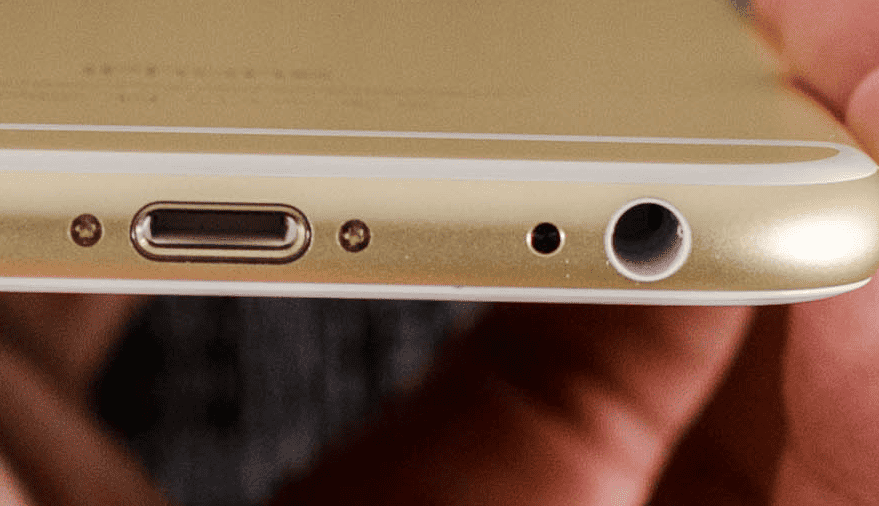
If your headphone jack is loose, broken, or clogged with debris, your headphones may not work. You can use a paper clip with double-sided tape to remove debris. Insert the sticky end into the jack, press firmly, and twist to clear the debris. This can quickly restore your headphones’ function. For more serious issues, like a broken jack, you may need to replace or repair it. You can measure the jack accurately and then replace it. Use wire strippers to prepare the old wire and connect it correctly to ensure a successful fix. If the headphone plug is bent, use two thin pliers to straighten it carefully. These steps can help you fix your headphones without having to buy a new pair.
Fixing a Broken Headphone Jack: A DIY Guide
Most of us have dealt with a finicky headphone jack at some point. It’s frustrating when your headphones cut out or only play sound in one ear. But don’t toss them just yet! Often, you can fix a headphone jack yourself with a few simple tools and some patience.
Common Headphone Jack Problems
Before you start repairs, it’s helpful to understand what might be wrong.
| Problem | Possible Cause |
|---|---|
| Sound only plays in one ear | Broken wire inside the cable |
| Intermittent sound or static | Loose connection or dirt in the jack |
| No sound at all | Completely broken wire or faulty jack |
Tools You’ll Need
Gather these tools before you get started:
- Wire cutters/strippers
- Soldering iron and solder (optional, but recommended for a more permanent fix)
- Heat shrink tubing (optional)
- Replacement headphone jack (if the old one is completely broken)
- Multimeter (optional, for testing connections)
Repairing a Broken Wire
- Locate the break: Gently bend the cable near the jack and listen for crackling or changes in sound. This can help you pinpoint the break.
- Cut the cable: Use wire cutters to cut the cable a little above the break.
- Strip the wires: Carefully strip away about 1/4 inch of insulation from the ends of the wires. You should see three or four wires: left channel, right channel, and ground (sometimes split into two wires).
- Solder or twist the wires: If you’re comfortable soldering, solder the matching wires together (left to left, right to right, ground to ground). Otherwise, carefully twist the bare wires together tightly.
- Insulate: Cover each connection with electrical tape or heat shrink tubing for safety and to prevent the wires from touching.
Cleaning a Dirty Jack
- Turn off your device: Disconnect your headphones and power off the device they were plugged into.
- Clean the jack: Use a can of compressed air to blow out any dust or debris. You can also dip a cotton swab in rubbing alcohol and gently clean the inside of the jack. Be careful not to damage the delicate contacts.
- Test: Plug your headphones back in and see if the sound is improved.
Replacing the Headphone Jack
If the jack itself is damaged, you’ll need to replace it. This is a more advanced repair and requires soldering skills. You can find replacement jacks online or at electronics stores. Refer to the instructions that come with the replacement jack, or search for a tutorial online specific to your headphone model.
Prevention Tips
- Avoid excessive bending or twisting of the headphone cable.
- Store your headphones in a case or pouch when not in use.
- Don’t yank on the cable when disconnecting them.
With these tips and a little DIY spirit, you can often breathe new life into your headphones and avoid the expense of buying a new pair.
Key Takeaways
- Remove debris from a loose headphone jack using a paper clip and tape.
- Measure and replace broken headphone jacks carefully.
- Straighten bent headphone plugs with thin pliers.
Diagnosing the Problem
To fix a headphone jack, first determine if the issue lies with the jack, the wire, or the device. Inspect the headphone jack and use a multimeter to check for connectivity problems.
Inspecting the Headphone Jack
Start by looking at the headphone jack closely. A flashlight can help. Look for dust or debris inside the jack. Clean the jack if needed. Use a small, soft brush or compressed air to remove any dirt.
Check if the headphone plug fits tightly. A loose headphone jack may cause poor connection. Try plugging in different headphones to see if the problem persists. If the issue remains, the jack might be damaged internally.
Using a Multimeter to Test Connectivity
A multimeter measures electrical connections. Set the multimeter to the continuity setting. Carefully touch each probe to the headphone wire—one on the tip, the other on the shaft. The device should beep if the connection is good.
Repeat for the left and right channels. If there is no beep, this indicates a break in the wire or a faulty jack. Testing both continuity and resistance can help pinpoint the problem. If the multimeter shows no continuity, consider replacing the jack or repairing the cable.
Frequently Asked Questions
To help viewers with common headphone jack issues, we have compiled easy and practical solutions. Topics include steps for fixing headphone jacks, replacement options, and cost considerations.
What are the steps to fix a broken headphone jack without soldering?
- Check if the headphone jack is dirty.
- Use compressed air to blow out dust.
- Use a toothpick to remove debris.
- If needed, replace the headphone plug with a solderless plug.
- Attach wires to the new plug securely.
Where can I find a replacement headphone jack for a female connector?
Replacement headphone jacks can be found in electronics stores such as RadioShack, Best Buy, or online on websites like Amazon and eBay. Make sure to get the correct size and type for your device.
How can one repair a malfunctioning headphone jack on an Android device?
- Clean the jack using a cotton swab and rubbing alcohol.
- Inspect for physical damage.
- Remove debris with compressed air.
- If issues persist, consider professional repair or replacing the device.
What is the process for fixing a headphone jack on a smartphone?
- Use a clean, dry toothbrush to brush out the headphone port.
- Insert a paperclip into the jack to gently remove stuck debris.
- Try a different pair of headphones to rule out headphone issues.
- If unsuccessful, visit a repair shop.
What are the common methods to repair a headphone jack on a computer?
- Inspect and clean the headphone port using compressed air.
- Update or reinstall audio drivers.
- Use an external USB sound card as a temporary fix.
- If the port is damaged, seek professional repair services.
How much does it typically cost to repair a headphone jack?
Repair costs can range from $10 to $50, depending on the device and the service provider. Some devices may cost more if parts need to be replaced. Professional services at repair shops usually charge higher but ensure quality fixes.

