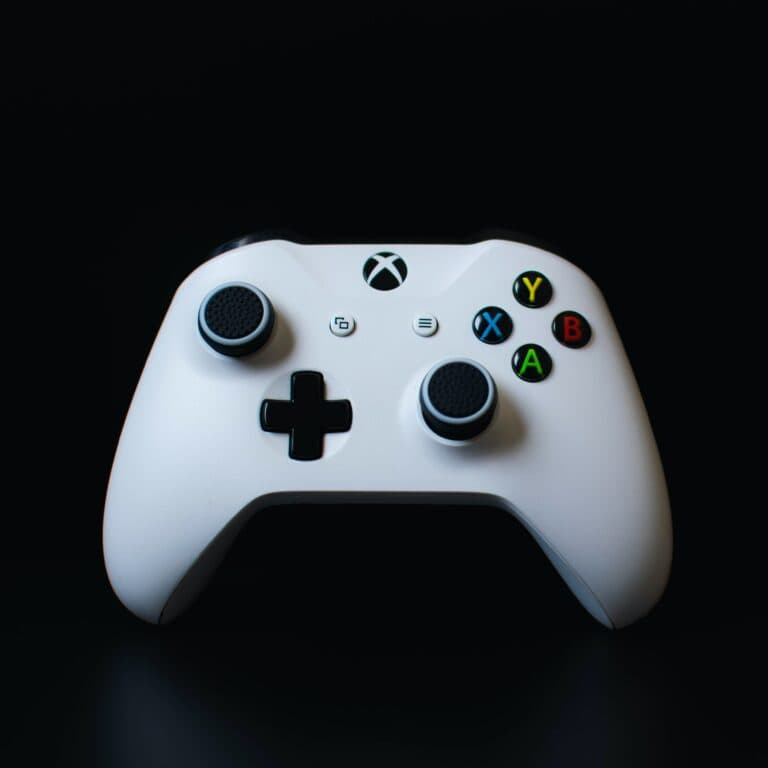
Xbox One controller drift can be a frustrating experience for gamers. It occurs when your character or camera moves on its own, even when you’re not touching the thumbsticks. This can make games unplayable and ruin your gaming experience. However, there are several quick and effective solutions you can try to fix this problem. Here’s a comprehensive guide on how to troubleshoot and fix Xbox One controller drift.
What Causes Stick Drift
Stick drift usually happens because of:
- Dust or debris inside the joystick module
- Worn-out potentiometers (the sensors that detect stick movement)
- Loose springs or thumbstick tension issues
- Software calibration problems
🧰 What You’ll Need
- A small Phillips screwdriver
- Isopropyl alcohol (70% or higher)
- Cotton swabs or a soft brush
- Compressed air (optional)
- Plastic prying tool (optional)
🪛 Step-by-Step Fix
Step 1: Power Off and Disconnect
Remove the batteries or disconnect the controller from your console/PC.
Step 2: Clean the Analog Stick
- Use compressed air to blow around the base of the drifting stick.
- Dip a cotton swab in isopropyl alcohol (not dripping wet).
- Gently push the stick to the side and clean around and under its base.
- Rotate the stick while cleaning to ensure full coverage.
- Let it dry for about 5–10 minutes.
💡 Tip: Many users find this alone fixes minor drift (source: Lifewire).
Step 3: Recalibrate the Controller
If cleaning doesn’t help:
- Connect your controller to your Xbox or PC.
- On Xbox:
- Go to Settings → Devices & Connections → Accessories
- Select your controller → Configure → Reset to default
- On PC (Windows):
- Open Control Panel → Devices and Printers
- Right-click your controller → Game Controller Settings → Properties → Calibrate
This resets the stick’s neutral position (source: iTechHacks).
Step 4: Deep Cleaning or Part Replacement (Advanced)
If drift persists, the analog stick module may be worn out.
You can:
- Open the controller using a Torx T8 screwdriver.
- Carefully remove the analog stick module.
- Replace it with a new one (available online for about $5–10).
Detailed teardown instructions: iFixit Guide
⚠️ Warning: Opening your controller may void your warranty. Proceed only if you’re comfortable with electronics.
Step 5: Test the Controller
Reconnect and test the sticks in a game or calibration tool.
If the drift is gone — you’re done!
🧩 Alternative Options
- Use Xbox Accessories app to adjust dead zones if drift is minor.
- Replace the controller if it’s under warranty — Microsoft often repairs or replaces drift-affected controllers for free.
✅ Summary
| Fix Type | Difficulty | Success Rate |
|---|---|---|
| Cleaning | Easy | ⭐⭐⭐⭐ |
| Recalibration | Easy | ⭐⭐⭐ |
| Part Replacement | Advanced | ⭐⭐⭐⭐⭐ |
| Warranty Replacement | Easy | ⭐⭐⭐⭐⭐ |
In short: Start with cleaning and recalibration — they fix most drift issues. If that fails, replacing the analog stick module is your best long-term solution (source: DeviceChecker).
Xbox Controller Drift: Troubleshooting Tips
Cleaning the Thumbsticks
Often, stick drift is caused by dirt and debris. Try these cleaning methods:
- Compressed air: Blow compressed air around the base of the thumbstick. Move the stick as you blow to loosen any trapped dirt.
- Cotton swab and rubbing alcohol: Dampen a cotton swab with rubbing alcohol and gently clean around the edges of the thumbstick. Let it dry completely before testing.
Adjusting Deadzones
You can adjust the deadzones in your Xbox settings to minimize the effect of minor drift. Here’s how:
- Go to Settings > Devices & Accessories.
- Select your controller and go to Controller Options.
- Adjust the Deadzone sliders for each thumbstick. Start with small adjustments and increase as needed.
Calibrating the Controller
If the drift is consistent, calibration might help. Follow these steps:
- Go to Settings > Devices & Accessories.
- Select your controller and choose Calibrate.
- Follow the on-screen instructions.
Replacing the Thumbsticks
If cleaning and calibration don’t work, the thumbsticks might be worn out and need replacing. You can find replacement thumbsticks online or at electronics stores.
Contacting Microsoft Support
If none of these solutions work, your controller might be faulty. Contact Microsoft Support for warranty repair or replacement.
Additional Tips:
- Use a controller cover: A silicone cover can help protect the thumbsticks from dirt and wear.
- Don’t press too hard: Avoid applying excessive force to the thumbsticks, as this can contribute to wear and tear.
- Store the controller properly: Keep your controller in a clean and dry place when not in use.
Comparison of Solutions
| Solution | Effectiveness | Difficulty | Cost |
|---|---|---|---|
| Cleaning | Moderate | Easy | Free |
| Adjusting Deadzones | Moderate | Easy | Free |
| Calibration | Varies | Easy | Free |
| Replacing Thumbsticks | High | Moderate | Low |
| Contacting Microsoft Support | High | Easy | Varies (warranty/replacement) |
Understanding Xbox One Controller Drift
When you’re deep into gaming on your Xbox One, the last thing you want is for your character to start wandering off on their own. This frustrating experience is often due to a problem known as controller drift. Controller drift happens when the analog sticks on your Xbox One controller register movement even when you’re not touching them. It’s like having a ghostly gamer who’s decided to join in on the fun, uninvited.
So why does this ghostly behavior show up? Drift can stem from a variety of issues:
- Wear and Tear: Just like the tires on a car, the analog sticks can wear down from usage.
- Dirt and Grime: Dust particles and other debris can sneak inside the controller, gumming up the works.
- Sensor Degradation: At the heart of each joystick is a sensor that can degrade with time, losing its accuracy.
Identifying controller drift is pretty simple:
- Your game character moves without input.
- Camera angles shift without guidance.
- Menus scroll as though someone is holding down the joystick.
Once you’ve spotted these signs, you’ve confirmed it’s drift you’re dealing with. But don’t worry, there are ways to address it. Each method targets a different potential cause and helps bring your controller back to its sharp, responsive self. Remember, a little know-how goes a long way in keeping your gaming experience smooth and drift-free.
Common Causes of Controller Drift
Controller drift can quickly turn a fun gaming session sour. This frustrating issue often stems from a few common problems with the Xbox controller’s hardware.
Accumulation of Dust and Debris
Over time, dust and debris can collect inside the controller, particularly around the thumbstick area. These unwelcome particles cause the stick to stick or move unexpectedly. Regular cleaning can help, but once the materials work their way deep inside, they impede the thumbstick’s movement and accuracy.
Wear and Tear of Thumbstick Pads
The thumbstick pads endure a lot of movement which leads to wear and tear. These worn-out thumbstick pads may not spring back properly to their original position, resulting in drift. The more intense the game play, the faster these components may degrade.
Damage to the Thumbstick Sensor
The thumbstick sensor is crucial for precise gameplay. Damage to this sensor from drops or heavy use can cause incorrect readings, leading to stick drift. Repairing this damage often involves more technical work, possibly requiring professional help if it’s beyond simple cleaning or pad replacement.
Preventive Measures
Keeping an Xbox controller in top condition requires a proactive approach. Regular upkeep and careful handling can prevent drift and prolong the lifespan of the device.
Regular Cleaning and Maintenance
Cleaning a controller is key to maintaining its functionality. Use a cotton swab dipped in isopropyl alcohol to gently clean around the buttons and thumbsticks. For tougher grime, lightly dampen a cotton ball with rubbing alcohol and wipe the surface areas. To remove dust from hard-to-reach places, use compressed air. It’s important to do this regularly, as build-up can lead to stick drift.
Proper Handling and Storage
Controllers are not immune to wear and tear, but careful handling can reduce the risk. Always hold the controller gently during gameplay to avoid applying excessive force to the thumbsticks and buttons. When not in use, store the Xbox One or Xbox Series X controller in a safe place, away from sunlight, heat, and dust. Protective plastic covers can shield the controller from accidental spills and drops.
Updating the Firmware
An often overlooked aspect of controller care is ensuring the firmware is up to date. Firmware updates can fix known issues and improve the responsiveness of the controller. To update, connect the controller to the Xbox One or Xbox Series X console, navigate to ‘Devices & Accessories’ under the ‘Settings’ menu, and select ‘Update Controller’. Make it a habit to check for updates regularly, as this can prevent many common problems, including drift.
Troubleshooting Steps
Before diving into any invasive repair efforts for Xbox controller drift issues, there are a few straightforward troubleshooting methods you can try. These can often resolve the problem without the need for complex repairs.
Restarting Your Console
Sometimes, the simplest fix is just to restart your Xbox console. This can refresh the system and potentially clear up any temporary issues affecting the controller’s performance. Simply hold the power button on the console until it shuts down completely, then wait a few moments and turn it back on.
Calibrating the Controller
If your controller’s inputs aren’t being registered accurately, calibrating might help. Head over to the Settings menu on your Xbox, locate “Devices & Accessories,” and select the controller you’re having issues with. Look for the calibration option and follow the on-screen instructions to recalibrate the controller’s analog sticks.
Adjusting Stick Deadzone
Adjusting the deadzone can mitigate drift by not registering minimal stick movements. To adjust the deadzone:
- Power on your Xbox console.
- Go to the Settings menu.
- Select “Devices & Accessories.”
- Choose your controller and find the “Configure” option.
- Locate the deadzone settings and adjust them to a level where the drift is no longer noticeable but the controller remains responsive to intentional movements.
By running through these steps, you can often fix Xbox controller drift without needing physical repairs. However, if these steps don’t resolve the issue, it may be time to consult with Microsoft support or consider a professional repair service.
Step-by-Step Repair Guide
This section provides detailed procedures for repairing the thumbstick drift on an Xbox One controller. It outlines the disassembling process, cleaning methods, and replacement of joystick modules.
Disassembling the Controller
Safety first: make sure your Xbox One controller is powered off and disconnected from any power source. Using a prying tool and a torx screwdriver, begin by gently removing the plastic covers located on the back of the controller. They should snap off with a bit of pressure. After that, remove the screws that secure the back casing to the controller using the torx screwdriver; there will be several of them.
Cleaning the Thumbstick Area
After the controller is open, focus on the area around the thumbsticks. This space often collects debris and dust that can cause drift. Start with compressed air to dislodge any loose dirt. Then, use a cotton swab dipped in isopropyl alcohol to clean around the joystick modules. Make sure everything is dry before reassembling.
Replacing the Joystick Modules
If cleaning doesn’t fix the drift, the joystick modules might be worn out and in need of replacement. To replace them, carefully detach the green plastic covers protecting the circuit board. Unscrew the modules using the torx screwdriver and gently lift them out with tweezers. Use a desoldering tool to remove the solder connecting the joystick module to the circuit board, and then a soldering tool to attach the new module. Reassemble the controller in reverse order after the soldering is complete and ensure all connections are secure.
When to Seek Professional Repair
Sometimes, fixing Xbox controller drift isn’t a simple DIY project. It’s essential to know when to turn to professionals for help. If your troubleshooting attempts have been unsuccessful, professional repair might be your best option. Below are situations when it is advisable to seek a professional’s touch:
- Warranty Status: If your controller is still under warranty, contact Microsoft Support. They often offer repairs or replacements at no additional cost.
- Damage Severity: When the drift is due to significant physical damage, such as evident cracks or broken components, a repair shop can assess and fix the issue.
- Complex Repairs: If the problem requires soldering or replacing internal mechanisms, professionals are equipped to handle these complex repairs accurately.
- Time and Resources: For those lacking the time or the right tools, a professional repair ensures your controller is in good hands without the hassle.
| Scenario | Action |
|---|---|
| Under Warranty | Contact Microsoft Support |
| Physical Damage | Visit a professional repair service |
| Complex Issues | Seek skilled technicians |
| Lacking Tools/Time | Opt for a reliable repair center |
Lastly, purchasing from retailers like Amazon may offer additional warranties or services. Before you attempt a DIY fix, check if you are eligible for any of these benefits, as unauthorized repairs can void warranties. Remember, a professional repair could extend the life of your controller and save you from further frustration.
Alternative Solutions and Upgrades
When Xbox controller drift issues arise, players don’t have to feel stuck. There are several methods to tackle the problem beyond traditional repair, including software calibration tools and hardware upgrades.
Using External Tools for Calibration
Players can use external software programs to recalibrate their controllers. This process adjusts the dead zones, which are areas where the thumbstick input is ignored, thus reducing unintended movement. For Xbox Series X/S and Xbox One S/X, calibration tools can fine-tune controller responses, allowing for a more precise gaming experience in titles like ‘Call of Duty’.
Upgrading to Hall Effect Joysticks
Another cutting-edge approach is to replace traditional thumbsticks with Hall Effect joysticks. These are more durable and less prone to drift, as they rely on magnetic sensors instead of the mechanical components found in standard joysticks. Users will find these particularly useful on Xbox Series S/X controllers, where precision is key.
Considering Third-Party Controllers
If repairs and upgrades seem daunting, one might consider third-party controllers, which often come designed to withstand rigorous gaming sessions. Brands such as DualSense for PlayStation 5 and various controllers available on Amazon offer alternatives to the standard Xbox controllers. Some of these are less susceptible to issues like drift, offering a fresh experience for console users.
Frequently Asked Questions
Navigating the choppy waters of controller drift can be tricky, but with the right info, you can steer your gaming back on course. Here are some common queries and guides to help you recalibrate your gaming experience.
What steps are required to calibrate an Xbox One controller to address drift issues?
To calibrate an Xbox One controller, firstly, access the device settings on your console. Look for the ‘Devices & Accessories’ section, select the controller, and find the calibration settings. Follow the on-screen instructions to recalibrate the thumbsticks, aiming for precise control and minimizing unwanted movements.
Can stick drift on an Xbox controller be repaired without disassembling the device?
Yes, some minor drift issues can be fixed without taking the controller apart. Adjusting the deadzone settings can help, as it changes the thumbstick sensitivity. Additionally, updating the controller’s firmware through the Xbox Accessories app might resolve the problem without the need to physically alter the device.
Is it possible to resolve stick drift problems on an Xbox Series X or Series S controller?
Yes, the Xbox Series X and Series S controllers can have their drift issues solved similarly to the Xbox One controllers. Calibration, firmware updates, and deadzone adjustments are your first steps. If these do not work, professional repair or replacement might be necessary.
What are some proven methods to eliminate controller drift found on gaming forums?
Many gamers have found success by cleaning the thumbstick area with compressed air or isopropyl alcohol. Some have also made slight modifications like adding a piece of paper to create more tension in the thumbstick module, although this could be a temporary fix.
Why has controller stick drift become a more widespread issue in recent times?
The increase in stick drift issues can be attributed to higher demand for gaming since the components may wear out quicker from extensive use. Also, manufacturing flaws and design oversights can contribute to the problem becoming more common.
What tricks can be employed to prevent a controller from experiencing drift?
Keep your controller clean and free from dust. Avoid harsh movements and clicks on the thumbsticks. Regularly updating your controller’s firmware can also help prevent the issue from cropping up, ensuring your gameplay remains smooth.

