Setting up a new computer is easy and plugging one in is usually a straightforward process where you can’t really make too many mistakes. First, get all the parts and cords you need, like the computer, monitor, keyboard, and mouse.
Then, put the computer tower in a good spot with lots of air. Next, plug the monitor, keyboard, and mouse into the computer. Finally, plug the computer into the wall and turn it on.
If you need to, follow the instructions to add programs. You’re done! Need more help? Keep reading for the steps spelled out with more details:
Step 1: Unbox and Place the Components
- Carefully remove all the components from their boxes: the PC tower, monitor, keyboard, mouse, and any speakers.
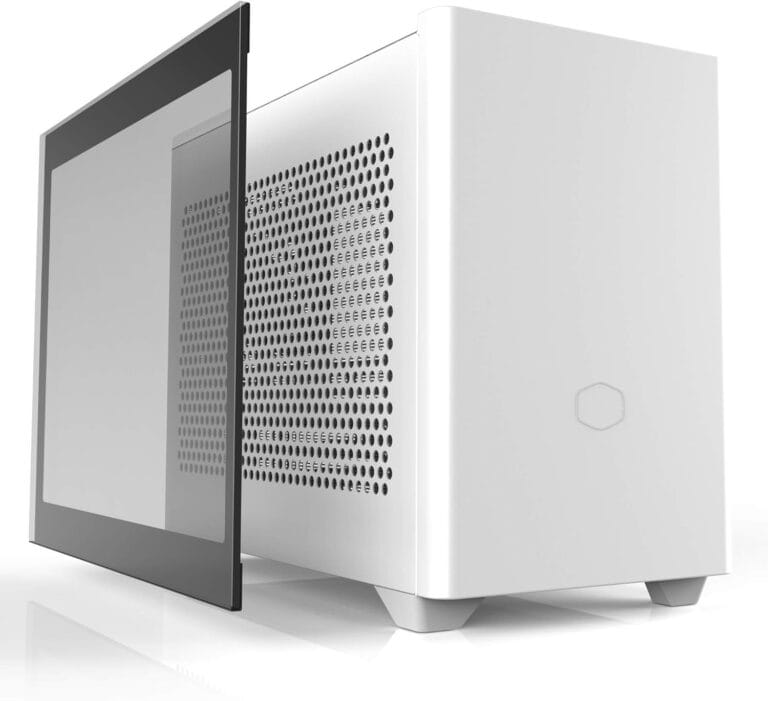
- Place the PC tower in its desired location, ensuring it has good airflow.
- Set up the monitor on your desk or table.
- Arrange the keyboard and mouse in a comfortable position.
Step 2: Connect the Monitor
- Locate the video cable that came with your monitor (this could be HDMI, DisplayPort, DVI, or VGA).
- Plug one end of the video cable into the back of your monitor.
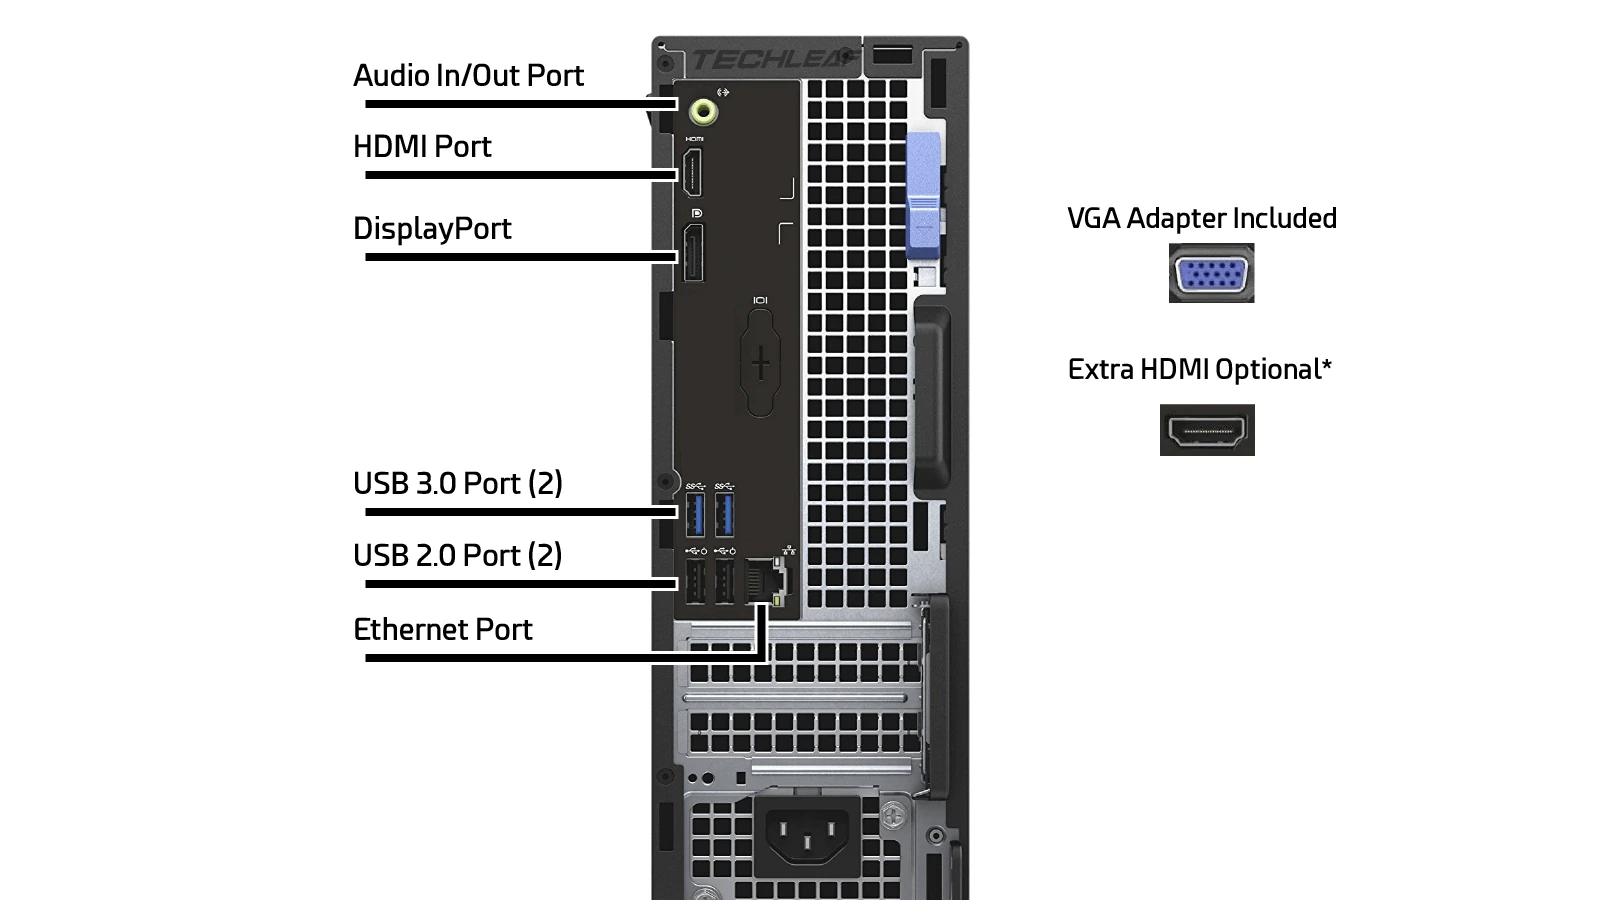
- Plug the other end into the corresponding port on the back of your PC tower. If your PC has a dedicated graphics card, make sure to plug the cable into one of its ports, not the motherboard’s built-in video ports.
Step 3: Connect the Keyboard and Mouse
- Most modern keyboards and mice use a USB connection.
- Plug the USB cables from the keyboard and mouse into any available USB ports on the front or back of the PC tower.
Step 4: Connect Speakers (if applicable)
- If you have speakers, they will likely connect to a 3.5mm audio jack or a USB port.
- For a 3.5mm jack, find the green audio port on the back of the PC and plug in the speaker cable.
- If they are USB speakers, plug them into an open USB port.
Step 5: Connect to Power
- Take the power cable for the monitor and plug it into the back of the monitor, then into a power outlet or surge protector.
- Take the power cable for the PC tower and plug it into the back of the tower, then into a power outlet or surge protector.
- It’s highly recommended to use a surge protector to protect your equipment from power fluctuations.
Step 6: Power On
- With everything connected, press the power button on the front of the PC tower.
- Press the power button on your monitor.
- The computer should now boot up, and you’ll see the operating system load on the screen.
If you are setting up a brand-new PC, you may be guided through an initial setup process to configure your operating system and user account.
Getting Started
Setting up a new PC is a lot easier than it looks. Here’s a simple guide on how to plug everything in and get started:
1. Components and Cables
Before you begin, take a moment to make sure you have all the parts:
- CPU Tower: The big box that houses everything.
- Monitor: Your screen.
- Keyboard and Mouse: For input.
- Power Cables: Usually two – one for the monitor, one for the tower.
- Display Cable: Typically HDMI or DisplayPort, connects the monitor to the tower.
2. Place the Tower
Find a stable spot with good ventilation for your CPU tower. Keep the back side accessible for plugging in cables.
3. Connect the Monitor
- Locate the display port on the back of the computer tower (it varies by computer).
- Plug one end of your display cable (HDMI, DisplayPort) into that port.
- Plug the other end of the cable into your monitor.
4. Keyboard and Mouse
- Most use USB ports (rectangular). Find a free USB port on the back of your tower and plug in your keyboard and mouse.
- Wireless keyboards and mice may require a USB adapter and pairing with your computer.
5. Power It Up
- Plug the power cable into the back of the CPU tower.
- Plug the other end into a surge protector or wall outlet.
- Repeat the process for your monitor.
6. Turn It On
Find the power button on your monitor and the CPU tower – and give them a press!
Troubleshooting Table
| Problem | Possible Solutions |
|---|---|
| No display | Check that the monitor and tower are powered on. Make sure the display cable is connected properly. Try a different cable or port. |
| Keyboard or mouse not working | Check USB connections. If wireless, try new batteries or follow the pairing instructions for your device. |
Key Takeaways
- Assembling a PC is manageable with step-by-step guidance.
- A tidy workspace and proper placement are critical for an easy setup.
- Correct port identification ensures smooth device connections.
Preparing to Connect Your PC
Before plugging in a desktop computer or laptop, knowing which cables connect with which ports is crucial. Ensure compatibility between your PC and other devices for a smooth setup process.
Identifying Necessary Ports and Cables
Every computer has a variety of ports for connecting devices. Common ports include USB, HDMI, and Ethernet. Here’s a quick guide to help you:
- USB ports: These come in multiple forms such as USB-A, USB 2.0, USB 3.0, and USB-C. They are used for mice, keyboards, and many other peripherals.
- Video ports: Depending on your display and PC, you may use HDMI, VGA, DVI, or DisplayPort. Some laptops use mini or micro HDMI.
- Ethernet cable: For a wired internet connection, locate the Ethernet port on your PC.
Understanding PC and Device Compatibility
Be aware of your PC’s operating system, whether it’s Windows 10, Windows 11, or macOS. This affects how you connect and configure devices.
- Windows PC: Check your system preferences to manage connected devices.
- Mac: Access the MacOS system preferences for device setup.
Devices like laptops may require an adapter or dongle if they lack certain ports. For example, a USB-C to HDMI converter lets you connect a monitor if you only have a USB-C port. Ensure your PC’s motherboard supports the connections you intend to use.
Establishing the Connection
When setting up a PC, making the right connections ensures the computer works correctly. This involves linking desktop computers to peripherals through various ports and setting up wireless or Bluetooth devices.
Wired Setup Procedures
For a wired connection, locate the USB ports on the computer. Connect peripherals like a keyboard or mouse to these ports. Plug in the desktop computer to a power source with the power cord. For internet access, connect one end of the Ethernet cable to the Ethernet port on the computer and the other to a router. Windows users can manage network settings through the Control Panel. Mac users will find similar options under System Preferences.
Wireless and Bluetooth Configuration
For wireless or Bluetooth connections, ensure the device is in pairing mode. On a Windows system, go to Settings and then to Devices to add a new device. Select the device from the list to complete pairing. Mac users will go through System Preferences and then to Bluetooth to connect. Make sure to verify audio output and input settings for devices like wireless headsets or gaming headsets to ensure they function as intended.
Device-Specific Connection Guidance
Connecting a wired headset involves plugging it into the headphone jack for audio output and possibly the microphone jack for audio input, if they are separate. For devices like Anker docking stations, connect the station to a USB port on your computer, then plug your peripherals into the docking station. This simplifies connecting multiple devices to a laptop or a desktop computer with limited ports.
Frequently Asked Questions
In this section, we cover the essentials of how to connect your desktop computer, including cable requirements to correct peripheral setup.
What are the steps for setting up a desktop computer?
Begin by placing the computer case on a stable surface with easy access to ports. Connect your monitor, keyboard, mouse, and power cable, then turn on the device by pressing the power button.
Which cables and connectors do I need for assembling a PC?
You will need a power cable for the computer and monitor, an HDMI or DisplayPort cable for the monitor, and usually USB cables for the keyboard and mouse.
How can I safely connect all the components of my computer?
Ensure the computer is off and unplugged before connecting components. Match cables to the correct ports and secure them without forcing. Once connected, plug the system into a surge protector.
What is the correct order for plugging in computer peripherals?
Plug in the monitor first, followed by the keyboard and mouse. After these are connected, you can plug in any additional peripherals like printers or external drives.
Can you provide a guide for connecting computer cables?
Identify each port and corresponding cable. For example, USB cables will only fit into USB ports, and HDMI cables connect to HDMI ports. Refer to the manual if you are unsure.
What should I consider when setting up a computer at home for the first time?
Find a clean area with good ventilation for your setup. Keep in mind the length of your cables, the location of electrical outlets, and the position of your computer for comfortable use.

