Screen recording on an iPhone is a seamless process that allows users to capture whatever is happening on their device’s screen. This built-in feature is invaluable for creating tutorials, gameplay videos, or even to save an online clip directly to your phone. While the function is not immediately visible, a quick setup in the iPhone’s settings enables it for use anytime through the Control Center.
Once enabled, starting a screen recording requires only a few taps. Users can navigate to the Control Center and initiate a recording with or without sound. A visible indicator, such as a red status bar or icon, notifies the user that the recording is active. Stopping the recording is just as straightforward, ensuring that videos are saved directly to the Photos app for easy access and sharing.
How to Record Your iPhone Screen
🔑 1. Enable Screen Recording in Control Center
Before you can record, you need to add the screen recorder to your Control Center.
- Open Settings.
- Go to Control Center.
- Scroll down and tap + Screen Recording.
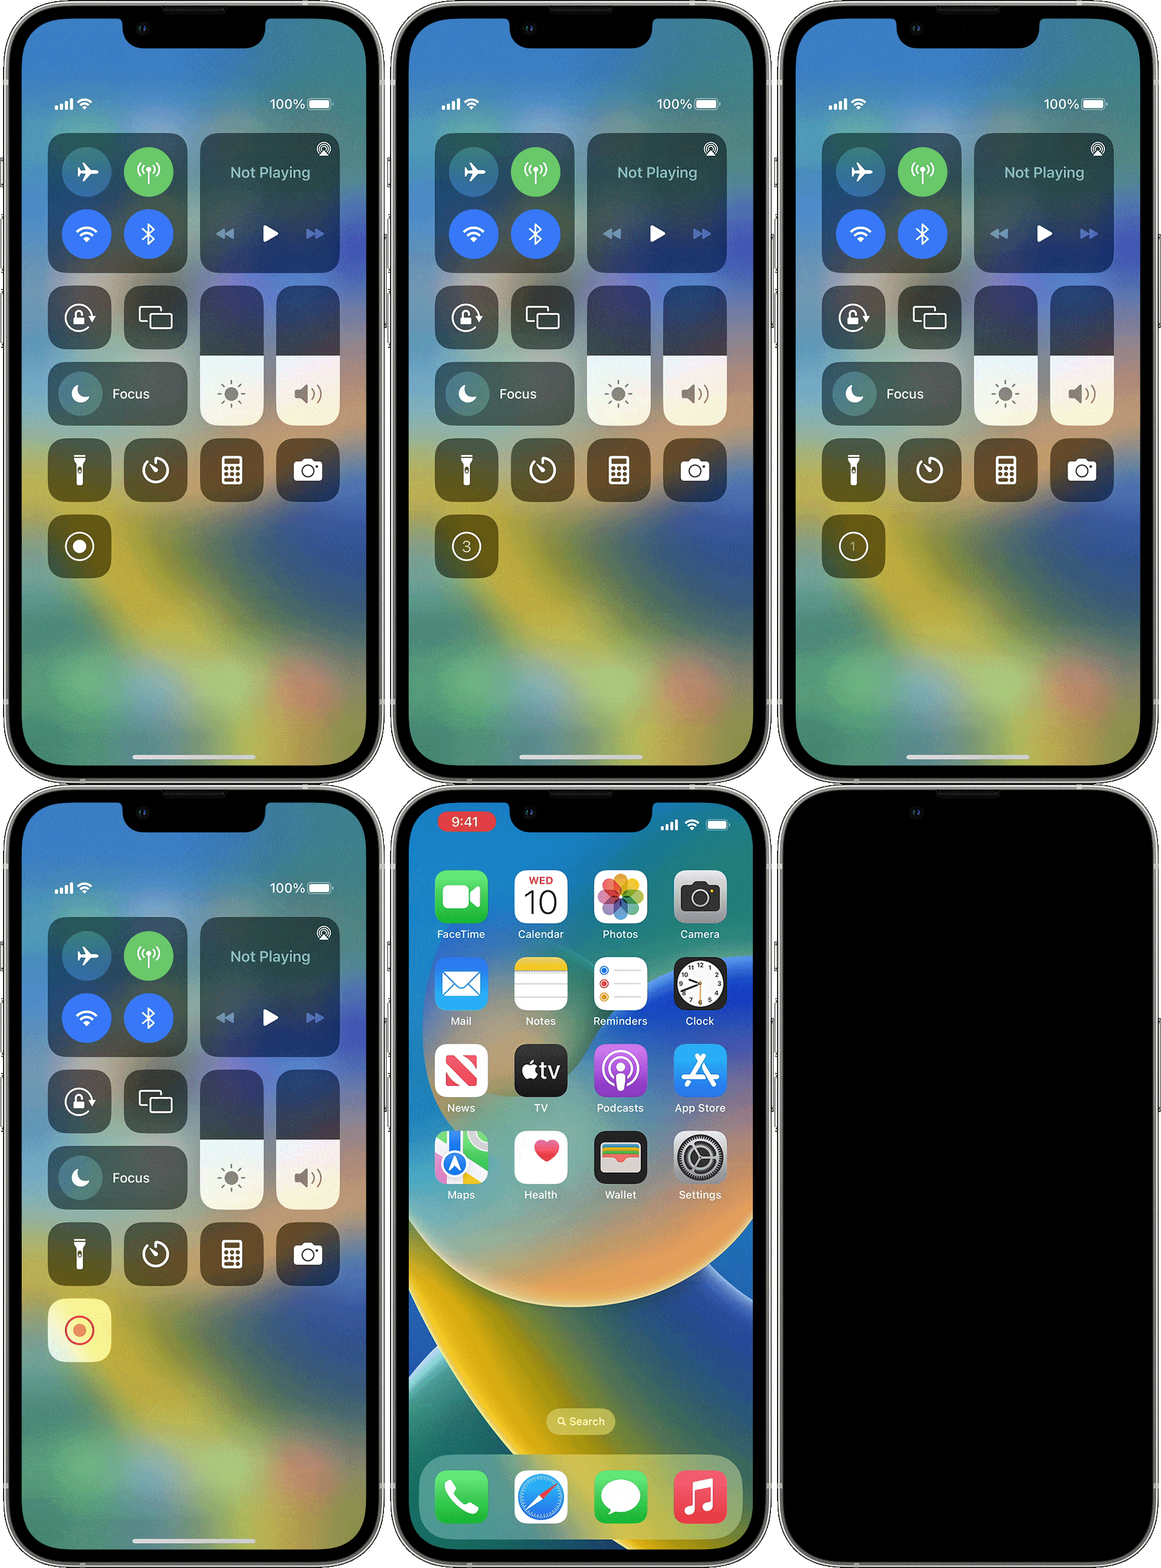
- It will now appear in your Control Center shortcuts.
▶️ 2. Start a Screen Recording
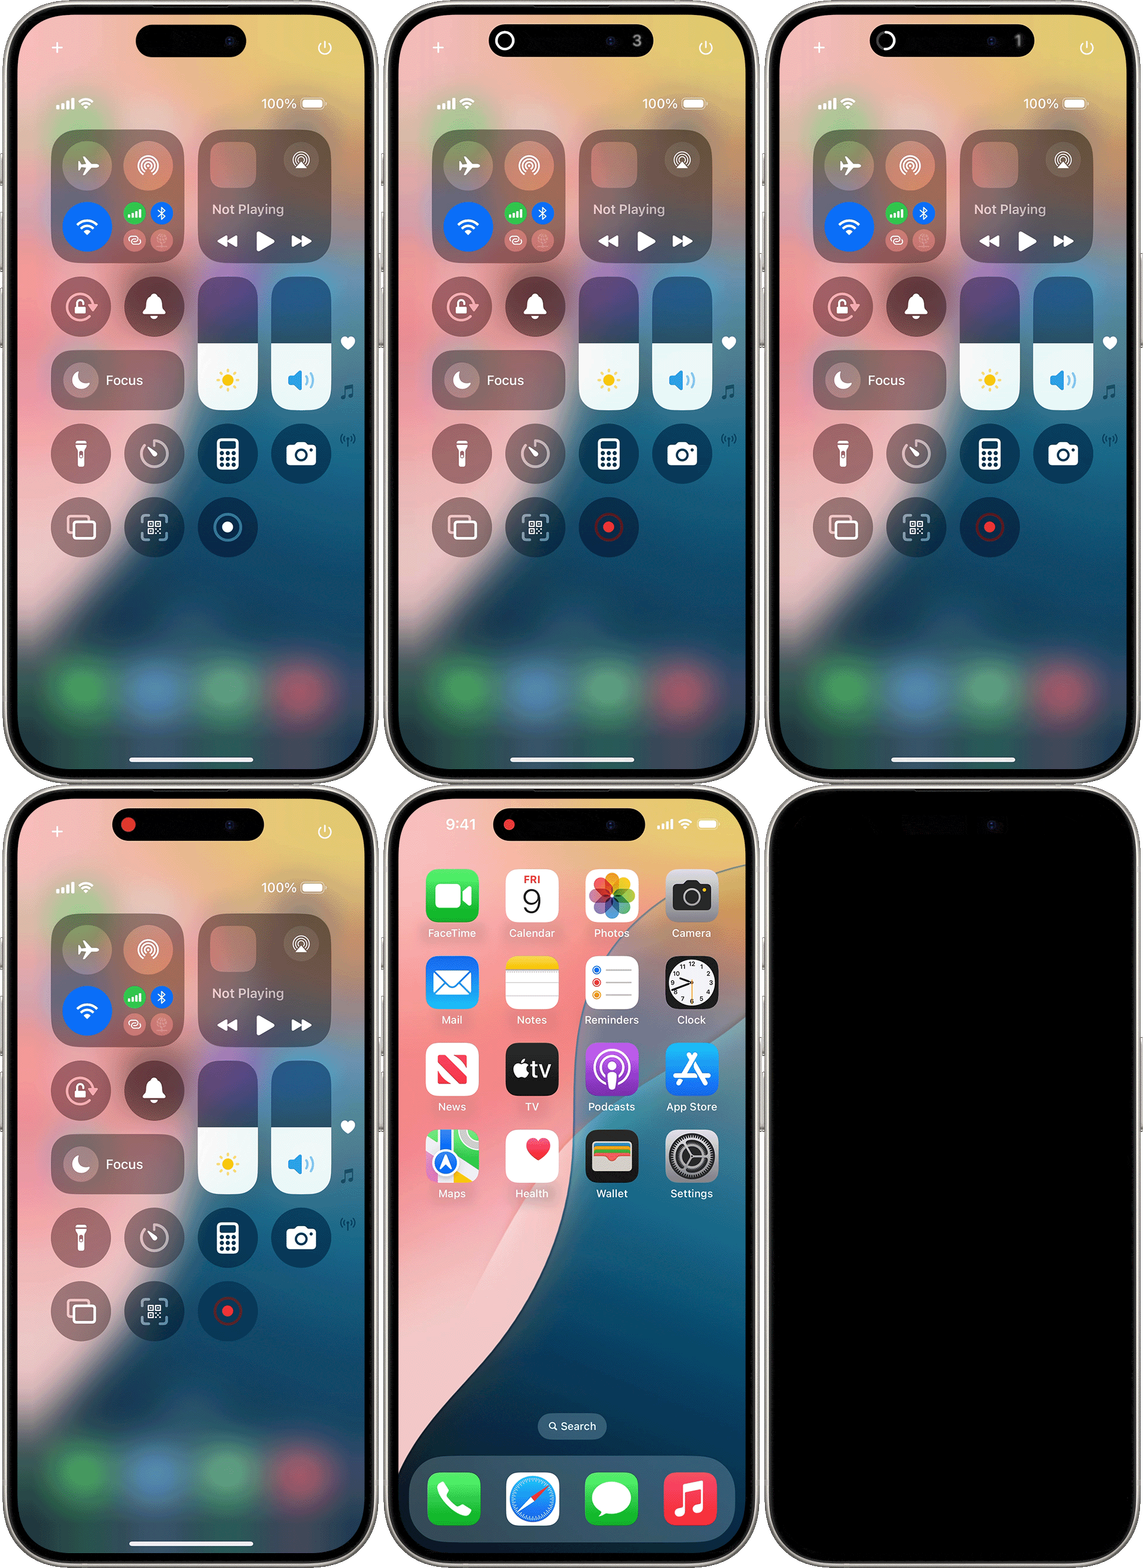
- Swipe down from the top-right corner of the screen (iPhone X and later) or swipe up from the bottom (iPhone SE, 8, and earlier).
- Tap the Record button (circle with a dot inside).
- A 3-second countdown will appear, then recording begins.
- The status bar / Dynamic Island / clock will turn red while recording.
🎙️ 3. Record with or without Audio
- To include microphone audio (for voiceover):
- Long-press (or 3D Touch) the Record button.
- Tap the Microphone icon to turn it on.
- Start recording.
- If you don’t enable this, the recording will only capture internal screen activity (no external sound).
⏹️ 4. Stop the Recording
- Tap the red status bar/Dynamic Island → select Stop.
- Or reopen Control Center → tap the Record button again.
- The video is automatically saved to your Photos app → Recents.
✂️ 5. Edit & Share Your Recording
- Open Photos → select your recording.
- Tap Edit to trim the beginning or end.
- Tap Share to send via AirDrop, Messages, Mail, or social apps.
⚠️ 6. Troubleshooting Tips
- No sound? Make sure the microphone is enabled before recording.
- Recording button missing? Re-add it in Settings → Control Center.
- Low storage warning? Free up space in Photos or iCloud to save recordings.
✅ Summary
- Add Screen Recording to Control Center.
- Start recording from Control Center.
- Enable the microphone if you want voiceover.
- Stop recording → video saves to Photos.
- Edit & share as needed.
Key Takeaways
- Screen recording on iPhone can capture any activity on the screen.
- Setting up screen recording involves a simple change in the iPhone’s settings.
- Starting and stopping a screen recording is managed through the Control Center.
Setting Up Screen Recording
Before using the screen recording feature on an iPhone, it’s essential for users to configure their device’s settings properly.
Access the Control Center
For iPhone models with Face ID, users can swipe down from the upper-right corner of the screen. On models with a Home button, they should swipe up from the bottom edge of the screen.
Add Screen Recording Button
Users need to customize their Control Center settings to include the screen recording function:
- Navigate to Settings.
- Select Control Center.
- Locate Screen Recording and tap the + sign to add it to the Control Center.
Enabling Microphone Audio
To record audio along with the screen recording, users can:
- Open Control Center.
- Press and hold the screen recording button.
- Tap the Microphone Audio button to turn it on before starting the recording.

