Laptop fans are usually reliable and can take years to fail, but as dust accumulates or if you’re dealing with a defective unit – once they need to be changed you have to do it. Otherwise you risk your laptop overheating and causing either instability or worse – hardware failure. Keeping your laptop cool is critically reliant on a functional internal fan and there’s no getting around that.
Replacing a Laptop Fan
Signs You Need a New Fan
Your laptop’s cooling system is essential to prevent overheating. The fan plays a crucial role in this system by expelling hot air. Here are some signs your laptop fan might need replacing:
- Excessive noise: Unusual whirring, grinding, or clicking sounds.
- Overheating: The laptop gets hot to the touch, even under normal use.
- Performance issues: The laptop slows down, freezes, or shuts down unexpectedly.
- Fan error messages: The system displays warnings about fan failure.
Finding the Right Replacement
- Identify your laptop model: Look for the exact model number, usually found on a sticker underneath.
- Search online: Use the model number to find compatible fans from retailers or the manufacturer’s website.
- Check specifications: Ensure the replacement fan matches the voltage, size, and connector type of the old one.
Gathering Tools
- Small screwdriver set: For removing screws from the laptop casing.
- Anti-static wrist strap: To prevent static damage to components.
- Thermal paste: To reapply between the fan and heat sink (optional).
- Compressed air: For cleaning dust from the cooling system (optional).
Replacing the Fan
- Power off and unplug: Disconnect the laptop from the power source and remove the battery.
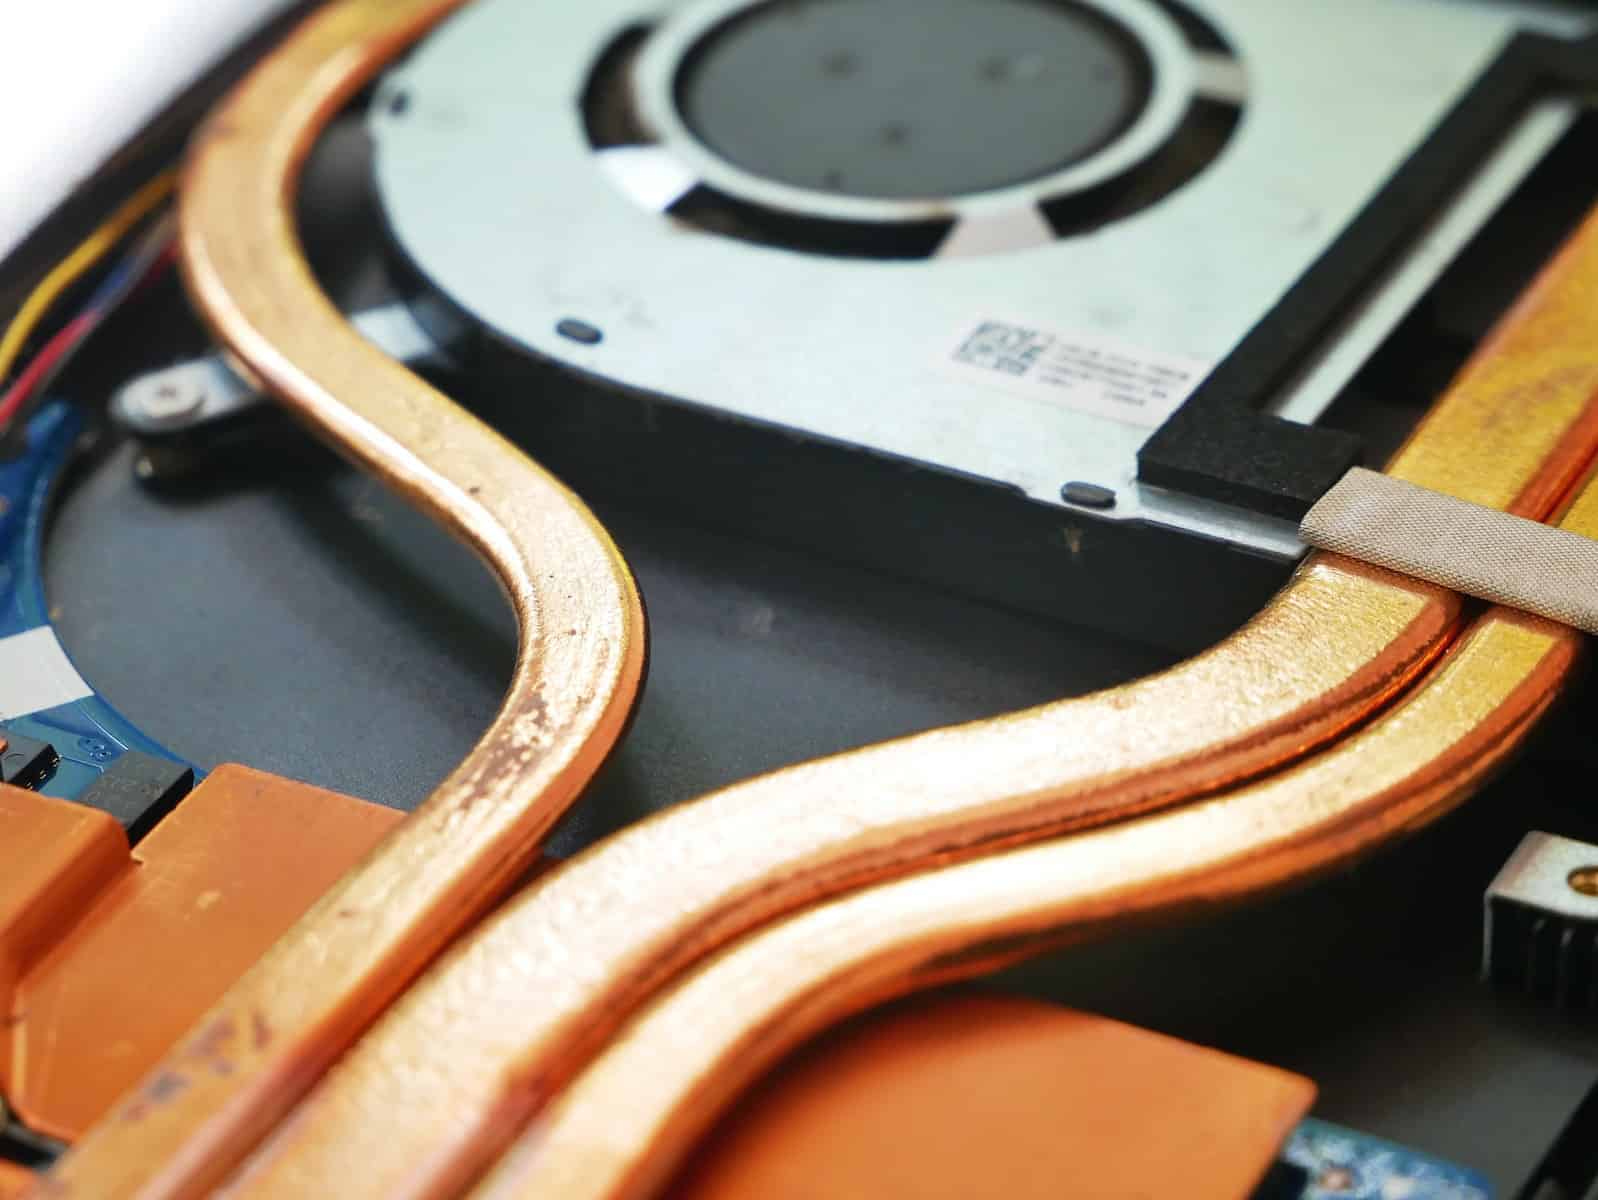
- Access the fan: Unscrew the back panel and locate the fan, usually near the vents.
- Disconnect the fan: Carefully unplug the fan’s power connector from the motherboard.
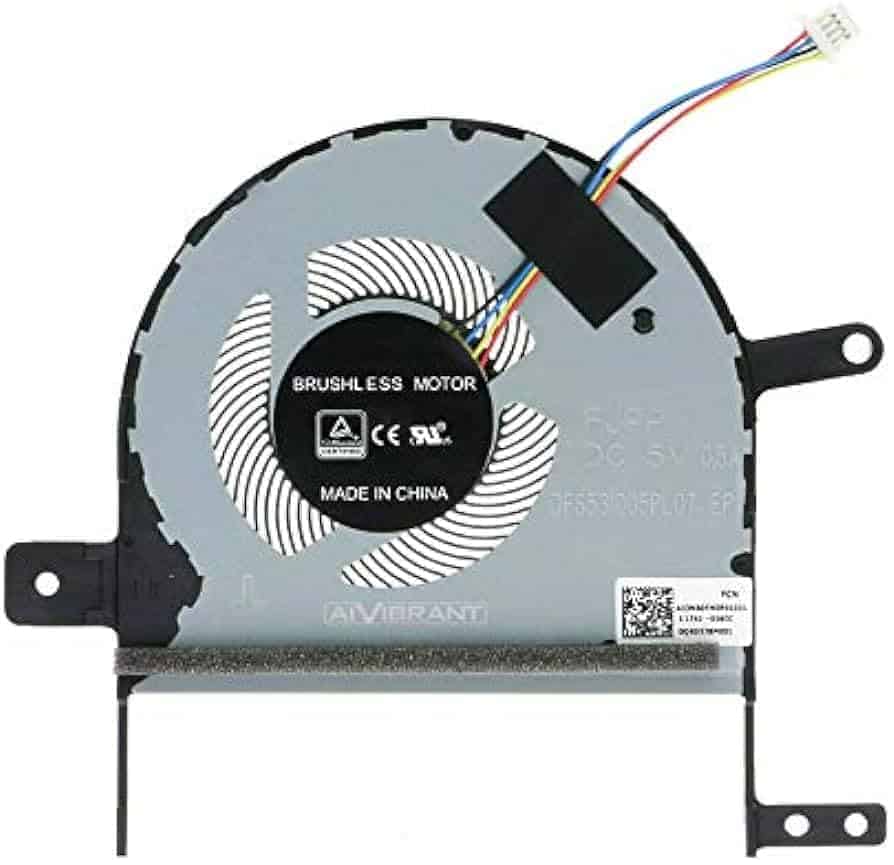
- Remove the old fan: Unscrew the fan from its mounting and detach it from the heat sink.
- Install the new fan: Attach the new fan to the heat sink, ensuring proper contact.
- Reconnect the fan: Plug the fan’s power connector back into the motherboard.
- Reassemble the laptop: Screw the back panel back on.
Testing and Precautions
- Power on and monitor: Check if the new fan spins quietly and effectively cools the laptop.
- Monitor temperatures: Use system monitoring tools to track the laptop’s temperature during use.
- Clean regularly: Periodically clean the vents and fan to prevent dust buildup.
Professional Help
If you are uncomfortable disassembling your laptop or encounter difficulties, consider seeking professional repair services.
Steps to Change Your Laptop Fan
| Step | Description |
|---|---|
| Preparation | |
| 1. Gather tools | Small Phillips screwdriver, compressed air (optional), replacement fan |
| 2. Back up data | Safeguard against potential data loss |
| 3. Turn off and unplug laptop | Prevent electrical shocks or damage |
| 4. Locate fan access panel | Usually on bottom, back, or side; consult manual if unsure |
| Replacing the Fan | |
| 1. Remove access panel | Use screwdriver to remove screws |
| 2. Locate fan | Usually near heat sink or CPU |
| 3. Clean area around fan (optional) | Use compressed air to blow out dust |
| 4. Disconnect fan cable | Gently unplug from motherboard |
| 5. Remove old fan | Unscrew and remove |
| 6. Install new fan | Place in same position and screw in |
| 7. Reconnect fan cable | Plug back into motherboard connector |
| 8. Replace access panel | Screw back into place |
| 9. Test laptop | Plug in and turn on; new fan should work |
| Additional Tips | |
| – Watch out for static electricity | Touch a grounded metal object before handling components |
| – Take your time | Avoid rushing and making mistakes |
| – Consult a professional if unsure | Seek qualified assistance if needed |
Understanding the Role of Your Laptop Fan
Why Your Laptop Fan is Important
Your laptop fan may appear to be just another component, but it plays a vital role in your laptop’s overall performance. It works continuously to cool down internal components, such as the CPU and GPU, by expelling hot air and drawing in cooler air. This process not only helps your laptop operate smoothly but also prevents overheating, which could lead to significant damage.
Common Causes of Fan Problems
- The Fan’s Work Schedule: Sometimes, your fan might not need to be on. If your laptop isn’t working hard, the fan might take a break.
- Software Controls: Your laptop’s fan control utility or BIOS settings might be turning the fan off.
- Power Plan Settings: Windows might switch off the fan based on your selected power plan.
- Physical Issues: Dust accumulation, disconnections, or a complete fan failure are also common culprits.
Step-by-Step Fan Fix
Checking Software and Settings
1. Fan Control Utility and BIOS: Check if the fan has been turned off in the fan control utility or BIOS. Resetting to default settings might just do the trick.
2. Windows Power Plan: Switch your power plan to Balanced or High-Performance to see if it gets the fan spinning again.
Getting Hands-On
3. Inspect Physical Connections: Sometimes, the issue might be as simple as a loose wire. Open up your laptop (carefully!) and check the connections.
4. Clean the Fan: Dust can be a major problem. Turn off your laptop, open it up, and gently clean the fan and vents with compressed air or a soft brush.
When It’s Time for a Replacement
5. Replace the Fan: If all else fails, it might be time for a new fan. This is where you might want to consult a professional or head to a service center.

Real-World Applications and User Experiences
Imagine you’re in the middle of an important project, and your laptop starts to heat up, slowing down your progress. This is where understanding your laptop’s cooling system becomes crucial. Regular maintenance, like cleaning the fan and checking software settings, can prevent these stressful situations.
Summary of Facts
- Laptop fans are essential for cooling internal components and preventing overheating.
- Common fan issues include software settings, power plans, and physical blockages or failures.
- Solutions range from checking software settings to physically cleaning or replacing the fan.
- Regular maintenance can prevent overheating and prolong your laptop’s life.
FAQs
How do I know if my laptop fan is not working properly?
If your laptop is overheating, running slow, or if the fan is unusually loud or silent, it might indicate a problem with the fan.
Can I clean the laptop fan myself?
Yes, you can clean the fan yourself using compressed air or a soft brush. However, be careful not to damage any internal components.
Is it expensive to replace a laptop fan?
The cost can vary, but it’s generally not very expensive. However, it’s crucial for your laptop’s health, so it’s a worthwhile investment.