Building your own gaming PC offers a rewarding experience and allows you to create a custom machine tailored to your needs. You can build a high-performance gaming PC by selecting compatible components, assembling them carefully, and installing the necessary software. This process gives you full control over your system’s specifications and often results in better value for money compared to pre-built options.
Many gamers find building a PC to be an enjoyable and educational project. It requires some technical knowledge, but with the right guidance, even beginners can successfully construct their own gaming rig. The key lies in understanding the function of each component and how they work together to create a powerful gaming machine.
Before starting the build, it’s essential to gather the necessary tools and create a suitable workspace. A clean, well-lit area with ample room to lay out components is ideal. With proper preparation and attention to detail, you can assemble a custom gaming PC that meets your specific requirements and budget.
Building a Gaming PC
Building a gaming PC can be a fun and rewarding experience. It allows you to choose the exact components you want and potentially save money compared to buying a pre-built system. Here’s a step-by-step guide to help you through the process:
1. Plan Your Build
Before you start buying parts, you need a plan. Consider these factors:
- Budget: Determine how much you can spend on your PC.
- Games: What games do you want to play? Demanding games require more powerful components.
- Performance goals: What resolution and frame rate do you want to achieve?
Once you have a general idea, you can start selecting components. Use online resources like PC Part Picker to check compatibility and compare prices.
2. Gather Your Components
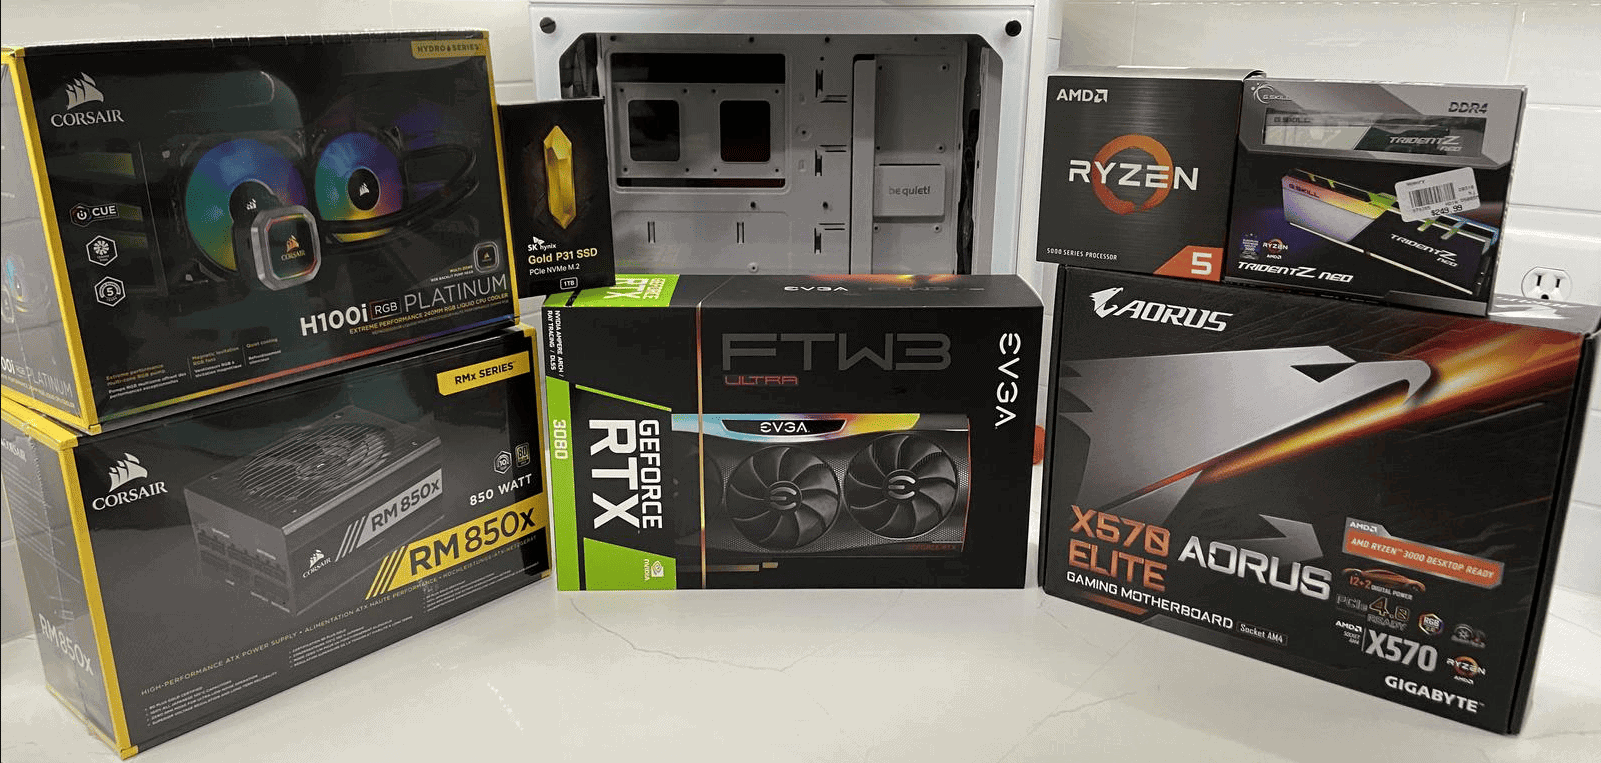
Here’s a list of essential components:
- CPU (Central Processing Unit): The “brain” of your computer. Popular choices include Intel Core and AMD Ryzen.
- GPU (Graphics Processing Unit): Handles the visuals for games. NVIDIA GeForce and AMD Radeon are the main options.
- Motherboard: Connects all your components. Choose one that’s compatible with your CPU and has the features you need.
- RAM (Random Access Memory): Stores data that your computer is actively using. Aim for at least 16GB for gaming.
- Storage: An SSD (Solid State Drive) for your operating system and games will provide fast loading times. You can also add an HDD (Hard Disk Drive) for extra storage.
- PSU (Power Supply Unit): Provides power to your components. Make sure it has enough wattage for your system.
- Case: Houses all your components. Choose one that fits your style and has good airflow.
- Cooling: A CPU cooler is essential. You might also want case fans for additional cooling.
3. Assemble Your PC
This is where the fun begins! Follow these general steps:
- Install the CPU on the motherboard.
- Install the RAM into the motherboard slots.
- Mount the motherboard in the case.
- Install the PSU in the case.
- Install the GPU into the PCIe slot on the motherboard.
- Connect the storage drives to the motherboard and PSU.
- Connect the necessary cables from the PSU to the motherboard and other components.
- Install the CPU cooler.
- Add case fans if needed.
Refer to your motherboard manual and online tutorials for detailed instructions.
4. Install the Operating System
Once your PC is assembled, you need to install an operating system, such as Windows. You’ll need a bootable USB drive with the operating system installation files.
5. Install Drivers and Software
After installing the operating system, install the necessary drivers for your components. You can usually find these on the manufacturers’ websites. Then, install your favorite games and other software.
Tips for Building Your First Gaming PC
- Start with a realistic budget.
- Watch build guides and read tutorials.
- Don’t be afraid to ask for help.
- Take your time and be careful.
- Enjoy the process!
Building a gaming PC can seem daunting at first, but it’s a rewarding experience. With careful planning and patience, you can create a powerful machine that meets your gaming needs.
Upgrading Your Gaming PC
As technology advances, you might want to upgrade your gaming PC to keep up with the latest games. Here’s how to prioritize your upgrades:
- GPU: The graphics card is often the first component to bottleneck performance. Upgrading to a newer, more powerful GPU can significantly improve your gaming experience.
- CPU: If you’re experiencing CPU-related performance issues, upgrading to a newer CPU can help. However, CPU upgrades often require a new motherboard as well.
- RAM: Adding more RAM can improve performance, especially in games that require a lot of memory.
- Storage: Upgrading to a larger or faster SSD can reduce loading times and improve overall system responsiveness.
Consider your budget and performance goals when deciding which components to upgrade. You can use online benchmarking tools to assess your current PC’s performance and identify areas for improvement.
Key Takeaways
- Custom-built gaming PCs offer better performance and value than pre-built options
- Careful component selection ensures compatibility and optimal gaming experience
- Proper assembly techniques and software installation are crucial for a successful build
Understanding PC Components
Building a gaming PC requires knowledge of key hardware components. Each part plays a crucial role in system performance and compatibility. Let’s explore the essential elements that make up a custom gaming rig.
Central Processing Unit (CPU)
The CPU is the brain of a computer. It handles calculations and instructions for all programs and tasks. Two main manufacturers dominate the market: Intel and AMD.
Intel offers processors like the Core i5, i7, and i9 series. AMD counters with Ryzen 5, 7, and 9 chips. Both companies produce high-performance CPUs for gaming.
Key factors to consider when choosing a CPU include:
- Clock speed (measured in GHz)
- Number of cores and threads
- Cache size
- Power consumption (TDP)
For gaming, a 6-core or 8-core processor often provides the best balance of performance and value. Higher-end chips with more cores benefit multi-tasking and content creation.
Graphics Processing Unit (GPU)
GPUs handle visual rendering in games and other graphics-intensive applications. They are crucial for gaming performance. NVIDIA and AMD are the primary GPU manufacturers.
NVIDIA’s GeForce RTX 30 and 40 series cards offer features like ray tracing and DLSS. AMD competes with their Radeon RX 6000 and 7000 series GPUs.
Important GPU specs include:
- VRAM capacity and type
- Core clock speed
- Memory bandwidth
- Power requirements
Higher-end GPUs provide better frame rates at higher resolutions and quality settings. Mid-range cards often offer the best price-to-performance ratio for 1080p gaming.
Motherboards
Motherboards connect all PC components together. They provide power distribution, data pathways, and expansion slots. Key features to look for include:
- CPU socket compatibility (e.g., LGA 1700 for Intel, AM5 for AMD)
- Chipset (determines features and overclocking support)
- PCIe slots for graphics cards and other expansions
- Memory slots and supported RAM types
- Storage connectors (SATA, M.2)
- USB ports and other I/O options
Popular motherboard brands include ASUS, MSI, Gigabyte, and ASRock. ATX is the most common form factor, offering a good balance of features and compatibility.
Memory (RAM)
Random Access Memory (RAM) provides fast, temporary storage for active programs and data. For gaming PCs, DDR4 is currently standard, with DDR5 emerging in newer systems.
Key RAM considerations:
- Capacity (16GB is recommended for gaming, 32GB for future-proofing)
- Speed (measured in MHz)
- Timings (lower is better)
- Dual-channel support
Faster RAM can improve system responsiveness and game performance, especially with AMD Ryzen CPUs. Choosing the right RAM is crucial for optimal system performance.
Storage Solutions
Storage devices hold your operating system, games, and files. Two main types are used in gaming PCs:
Solid State Drives (SSDs):
- Faster boot times and game loading
- More expensive per GB
- Available in 2.5″ SATA and M.2 NVMe formats
Hard Disk Drives (HDDs):
- Slower but cheaper per GB
- Good for bulk storage of games and media
Many gamers use a smaller SSD for the OS and favorite games, with a larger HDD for additional storage. NVMe SSDs offer the fastest speeds but are more expensive.
Power Supply Unit (PSU)
The PSU provides electrical power to all components. Key factors in PSU selection:
- Wattage (550W-750W is typical for mid-range builds)
- Efficiency rating (80 Plus Bronze, Gold, Platinum)
- Modularity (helps with cable management)
Reputable brands like Corsair, EVGA, and Seasonic offer reliable PSUs. It’s important to choose a PSU with enough wattage to support your components, especially high-end GPUs.
PC Case
The case houses and protects all components. Important case features include:
- Size and form factor compatibility (ATX, Micro-ATX, Mini-ITX)
- Airflow and cooling options
- Cable management features
- Front panel I/O ports
- Aesthetics (if important to the builder)
Popular case manufacturers include Fractal Design, NZXT, and Corsair. Good airflow is crucial for keeping components cool during intense gaming sessions.
Planning Your Build
Planning a gaming PC build requires careful consideration of budget, performance needs, and future upgradability. This process ensures you create a system that meets your gaming expectations while staying within your financial limits.
Determining Your Budget and Performance Needs
The first step in planning a gaming PC build is setting a budget. This decision will guide all subsequent choices. Budget gaming PCs typically range from $500 to $800, while high-end builds can exceed $2000.
Consider the types of games you play and the performance you desire. For 1080p gaming at 60 FPS, a mid-range build suffices. 4K gaming or high refresh rates require more powerful components.
Assess your priorities. Do you need top-tier graphics or is a balance of CPU and GPU power more important? This helps allocate your budget effectively.
Selecting Compatible Components
Choose components that work together seamlessly. The motherboard is the foundation, determining CPU socket, RAM type, and expansion options.
Select a CPU that matches your performance needs. AMD and Intel offer options at various price points. Pair it with a compatible GPU for optimal gaming performance.
RAM, storage, and power supply must align with your chosen CPU and GPU. 16GB of RAM is standard for gaming. Consider an SSD for faster load times.
• Motherboard
• CPU
• GPU
• RAM
• Storage
• Power Supply
Ensure your case can accommodate all components and provides adequate cooling.
Future-Proofing Your System
Build with upgrade potential in mind. A modular power supply allows for easy component additions. Choose a motherboard with extra RAM slots and M.2 ports for future expansion.
Invest in a quality CPU and motherboard. These components are harder to upgrade later and form the core of your system.
Consider technologies like PCIe 4.0 for faster storage and GPU performance. While not essential now, they may become more important in future games.
Building a gaming PC with future-proofing in mind can extend the lifespan of your system and save money in the long run.
Building The Foundation
Building a gaming PC requires careful assembly of core components, installation of the operating system, and proper BIOS/UEFI setup. These steps form the foundation for a high-performance gaming rig.
Assembling the Core Components
The PC building process starts with assembling the main parts. First, install the CPU into the motherboard socket. Apply thermal paste and attach the CPU cooler.
Next, insert RAM sticks into the designated slots. Install the motherboard into the case, securing it with screws. Connect power supply cables to the motherboard.
Place the graphics card into the PCIe slot and connect power cables. Install storage drives in drive bays or M.2 slots. Ensure all cables are properly connected and neatly managed.
Double-check all connections before closing the case. This step is crucial for proper functionality and airflow.
Installing the Operating System
After assembly, install the operating system. Windows is popular for gaming PCs. Create a bootable USB drive with the OS installation files.
Connect the USB drive and power on the PC. Enter BIOS/UEFI and set the USB as the boot device. Save changes and restart.
Follow on-screen prompts to install the OS. Choose the installation drive and wait for the process to complete. After installation, install necessary drivers for components.
Update the OS and drivers regularly for optimal performance and security.
Setting Up BIOS/UEFI
BIOS or UEFI setup is crucial for optimal PC performance. Access BIOS/UEFI by pressing a specific key during startup, usually Del or F2.
Set the correct boot order to prioritize the main storage drive. Enable XMP profiles for RAM to run at advertised speeds. Adjust fan curves for efficient cooling.
For overclocking, carefully adjust CPU and GPU settings. Monitor temperatures to ensure stability. Save changes and exit BIOS/UEFI.
Regularly update BIOS/UEFI firmware for improved compatibility and performance.
Enhancing Your Gaming Experience
Optimizing your gaming setup goes beyond building a powerful PC. The right peripherals and display can significantly improve your gameplay and immersion.
Choosing the Right Gaming Monitor
When selecting a gaming monitor, consider three key factors: refresh rate, response time, and resolution. A high refresh rate, ideally 144Hz or above, ensures smooth motion in fast-paced games. Look for monitors with 1ms response times to minimize input lag.
Resolution affects image clarity. 1080p is standard, but 1440p offers a good balance between sharpness and performance. 4K monitors provide stunning visuals but require more powerful hardware to run games smoothly.
Gaming monitors with G-Sync or FreeSync technology prevent screen tearing. These features synchronize the monitor’s refresh rate with the GPU’s frame output.
Consider the panel type as well. IPS panels offer better color accuracy and viewing angles, while TN panels typically have faster response times.
Gaming Peripherals
Quality peripherals can enhance your gaming experience and improve performance. A gaming mouse with high DPI (dots per inch) settings allows for precise cursor control. Look for mice with customizable buttons for quick access to in-game actions.
Mechanical keyboards are popular among gamers for their tactile feedback and durability. Choose switches that match your preferences – linear for smooth keystrokes or tactile for a more pronounced feedback.
A good headset is crucial for immersive audio and clear communication in multiplayer games. Look for headsets with surround sound capabilities and a comfortable fit for long gaming sessions.
Consider a gaming mousepad with a low-friction surface for smoother mouse movements. Some mousepads even come with RGB lighting to match your setup’s aesthetic.
Cooling and Thermal Management
Effective cooling and thermal management are crucial for a high-performance gaming PC. Proper cooling solutions, correct thermal paste application, and optimized airflow help maintain optimal temperatures and prevent thermal throttling.
Air vs. Liquid Cooling Solutions
Air cooling and liquid cooling are the two main options for managing heat in a gaming PC. Air cooling uses heatsinks and fans to dissipate heat. It’s generally more affordable and easier to install. High-end air coolers can match the performance of some liquid cooling solutions.
Liquid cooling circulates coolant through a closed loop to remove heat from components. It’s often more efficient and quieter than air cooling. Custom cooling systems offer the best performance but require more maintenance and expertise.
For most users, a quality air cooler is sufficient. Enthusiasts seeking maximum performance or a sleek aesthetic may prefer liquid cooling. Consider factors like budget, noise tolerance, and case size when choosing between air and liquid cooling.
Applying Thermal Paste
Thermal paste improves heat transfer between the CPU and cooler. Proper application is essential for effective cooling. Clean the CPU surface with isopropyl alcohol before applying paste.
Apply a small amount of paste to the center of the CPU. A pea-sized dot is usually sufficient. Don’t spread the paste manually; the pressure from installing the cooler will distribute it evenly.
High-quality thermal pastes can improve cooling performance by several degrees. Reapply paste every few years or when removing the cooler.
Optimizing Airflow in Your Case
Good airflow is critical for efficient cooling. Aim for positive air pressure by having more intake fans than exhaust fans. This helps reduce dust buildup inside the case.
Position intake fans at the front and bottom of the case. Place exhaust fans at the rear and top. Ensure cables are neatly managed to avoid obstructing airflow.
Consider fan placement carefully. Front intake fans should align with GPU and CPU coolers. Top exhaust fans work well with liquid cooling radiators. Clean cable management not only looks better but also improves airflow significantly.
Customization and Aesthetics
Building a custom gaming PC offers unique opportunities for personal expression. RGB lighting and cable management are key elements that enhance both form and function.
Personalizing Your PC with RGB Lighting
RGB lighting transforms a gaming PC into a vibrant centerpiece. Custom gaming PCs often feature programmable LED strips, fans, and components. These lights can sync with games, music, or system temperatures.
RGB controllers allow users to create custom color schemes and effects. Some popular options include:
- Static colors
- Color cycling
- Reactive lighting
- Audio visualizers
Many PC cases now come with built-in RGB features. Tempered glass panels showcase the internal lighting. Users can coordinate colors across different brands using software like Corsair iCUE or NZXT CAM.
Cable Management for a Neat Setup
Proper cable management improves airflow and aesthetics. It involves routing and securing cables to minimize clutter. Good cable management makes component upgrades easier.
Tips for effective cable management:
- Use modular power supplies
- Plan cable routes before installation
- Utilize case cable tie-downs
- Group similar cables together
- Hide excess cable length behind the motherboard tray
Cable combs help organize and align visible cables. Braided cable extensions add a premium look. Some cases feature built-in cable covers or shrouds.
Neat cable management not only looks better but can also improve system cooling. It allows for unobstructed airflow, potentially lowering temperatures.
Additional Considerations
Building a gaming PC requires attention to certain key aspects beyond component selection. Proper power connections and understanding warranty coverage are crucial for a successful build and long-term reliability.
Ensuring a Solid Power Connection
A stable power supply is essential for a gaming PC’s performance and longevity. When selecting a power supply unit (PSU), consider the following:
- Wattage: Choose a PSU with sufficient capacity for all components.
- Efficiency rating: Look for 80 Plus Bronze or higher certification.
- Modularity: Modular PSUs allow for cleaner cable management.
Check all power connections twice before powering on the system. Ensure CPU, GPU, and motherboard power cables are firmly seated. Use cable ties to manage excess wiring, improving airflow and aesthetics.
Warranty and Support for Components
Understanding warranty terms and available support options safeguards your investment. Key points to consider:
- Read warranty documents for each component carefully.
- Register products with manufacturers promptly after purchase.
- Keep receipts and packaging for potential RMA processes.
Many component makers offer extended warranty options. These can be worthwhile for high-cost parts like GPUs and CPUs. Some retailers provide additional protection plans or free shipping for warranty claims.
Check online resources like manufacturer forums and build guides for troubleshooting help. Many companies offer email and chat support for technical issues.
Alternatives to DIY Builds
Building a custom gaming PC isn’t the only way to get a high-performance system. Pre-built PCs and custom PC services offer convenient alternatives for gamers who prefer not to assemble their own rigs.
Assessing Pre-Built PCs
Pre-built gaming PCs provide a hassle-free option for those who want a ready-to-use system. Major brands and boutique builders offer a range of models to suit different budgets and performance needs.
Pre-built PCs often come with warranties and technical support, which can be reassuring for less tech-savvy users. They also eliminate the risk of component incompatibility or assembly errors.
However, pre-built systems may have limited customization options. Some manufacturers use proprietary parts, making future upgrades challenging. Pricing can also be higher compared to DIY builds, as buyers pay for assembly and brand premiums.
Popular pre-built gaming PC brands include:
- Dell/Alienware
- HP Omen
- Lenovo Legion
- ASUS ROG
Custom PC Services
Custom PC services bridge the gap between pre-built and DIY options. These companies allow customers to choose their components and have professionals assemble the system.
Custom PC builders like iBuyPower and CyberPowerPC offer online configurators. Users can select parts based on their budget and performance requirements. This approach provides more flexibility than pre-built PCs while avoiding the complexities of DIY assembly.
Benefits of custom PC services include:
- Expert assembly
- Wide component selection
- Performance testing
- Cable management
Potential drawbacks are longer wait times for assembly and shipping, as well as higher costs compared to DIY builds. Some services may have limited international shipping options.